
Working with metal opens up a world of projects that are both useful and surprisingly creative. You can cut, shape, and weld it into handy tools, furniture, or just fun decorative pieces that actually last. It’s a great way to get hands-on experience while making stuff that really adds something to your space.
With a mix of simple builds and more involved projects, you get to try out new techniques and slowly level up your skills. Maybe you’re in the mood for something quick and practical, or maybe you want to take on a bigger piece that’ll really stand out. Either way, there’s plenty here to keep things interesting!
1) Welded Scrap Metal Garden Sculpture

Leftover metal bits? Don’t toss them, instead turn them into unique garden sculptures with just a welder and a bit of imagination. Old tools, gears, or even rebar can be pieced together into animals, abstract shapes, or whatever pops into your head.
It helps to sketch out a rough idea first, just so you’re not winging it the whole way. Tack weld the main pieces, then start adding smaller scraps for details and texture.
Definitely finish it off with something weather-resistant so it survives outside. A clear coat or rust-proof paint goes a long way to keep your sculpture looking good through all sorts of weather.
2) Handmade Metal Stamped Jewelry

Making personalized jewelry doesn’t have to be complicated. With a basic metal stamping kit, a hammer, and some metal blanks, you’re pretty much set.
Stamp names, special dates, or little words onto pendants, bracelets, or rings. Even just a few letters can make a piece feel personal, no need for fancy skills.
Try out different metals: aluminum is light and easy, brass and copper have a warmer vibe. Each one takes stamping a bit differently, so you can play around until you find what you like.
3) Custom Sheet Metal Storage Boxes

Making storage boxes from sheet metal is pretty straightforward. You just need to cut, bend, and fasten a few pieces – great practice for measuring and marking without burning through a ton of material.
You can make a tiny tray for screws or go big enough to stash tools. Just tweak the dimensions to fit whatever you want to store.
Scrap sheet metal from old appliances or computer cases is perfect for this. With a little patience, you end up with a sturdy box that actually comes in handy around the shop or garage.
4) DIY Metal Wall Art Panels

You can make wall art panels from sheet metal, corrugated tin, or even random scraps. Cut the panels into whatever shapes or patterns you like, then sand and paint them for a cleaner look.
If you want to get fancy, try adding texture with stamping or light welding. Layering different metals (like shiny steel with a bit of rusty iron) gives it some nice contrast.
Hang the panels with brackets or in a wooden frame. You could go for one big piece or spread out a few smaller ones if you want to cover more wall.
5) Welded Steel Fire Pit

Building a fire pit from flat steel panels or old sheet metal isn’t as tough as it sounds if you’ve got basic welding skills. Sketch out your shape, cut the pieces with a plasma cutter or angle grinder, and you’re off.
Clamp the panels and tack weld the corners first, makes it easier to keep everything straight. Working from the center out helps with heat and keeps things from warping.
Add a base plate or some simple legs for stability. Once it cools, smooth out any sharp edges and either leave it raw or hit it with high-temp paint.
6) Metal Coat Rack from Pipes

A coat rack made from black iron or galvanized pipes is about as sturdy as it gets. You just screw the fittings together, no special tools except a wrench and maybe a drill.
Use flanges at the base for a freestanding rack, or mount it to the wall if you want something more permanent.
Want extra bars or shelves? Just add more pipes and fittings. This flexibility means you can tweak the setup to fit your space, whether you’ve got a little entryway or a big mudroom.
7) Upcycled Metal Toolbox Organizer

Got an old metal toolbox lying around? Turn it into a handy organizer for your desk, workshop, or entryway. The built-in compartments make sorting tools, office stuff, or craft odds and ends way easier.
Paint it for a fresh look, or just leave the original finish if you like that vintage vibe. Sometimes a bit of wear gives it extra character.
It works just about anywhere – on a shelf, counter, or even mounted to the wall. The compact size is perfect for tight spots but still holds a surprising amount.
8) Electro Etched Metal Signs

Electro etching is a cool way to make metal signs that last. Basically, you use electricity and an electrolyte solution to eat away at the metal, leaving behind crisp, permanent designs.
Start by making a stencil – anything you cover won’t get etched. The exposed parts react and get marked.
You don’t need fancy gear: a basic power supply, felt pad, and some saltwater gets you going. With a steady hand, you can etch clear letters or even simple logos onto stainless steel, brass, or copper.
9) DIY Metal Candle Holders

Making candle holders out of metal can be as simple as cutting and bending some sheet, pipe, or even wire. Thin metal is easy to shape and holds candles securely without much fuss.
Copper and brass give a warmer glow, while steel looks more modern. Mixing up finishes, such as matte black with shiny silver, can totally change the mood.
If you’re feeling quick and thrifty, wrap old jars in metal mesh or strips for instant holders. Even weird scraps or radiator grates can turn into surprisingly cool bases.
10) Steel Frame Coffee Table

A welded steel frame paired with a wood top makes for a coffee table that’s both tough and stylish. That mix of metal and wood just works, doesn’t it?
Use square steel tubing for the frame. Cut your pieces, tack them together, and make sure everything’s square before you finish the welds.
Once the frame is done, sand the welds smooth and add a protective finish – paint or powder coat, your call. Attach the wood top from underneath for a clean, sturdy build.
11) Metal Bookends from Scrap

If you’ve got leftover steel or sheet metal, it’s easy to whip up some solid bookends. Scrap square tubing or expanded metal is heavy enough to keep books upright.
Just cut your pieces to size and bend or weld them into an L-shape. That’s really all you need for stability.
You can add little details: grind in some patterns, leave the metal raw, or go for an industrial look. It’s a practical way to use up scraps and keep your shelves tidy.
12) No-weld Wire Baskets

Wire baskets are super handy and not too hard to make. Grab some steel mesh or wire panels, cut them to size, and bend up the edges to form a sturdy frame. They don’t bend or collapse like cheap store-bought ones.
These baskets work just about anywhere – garage, kitchen, garden. Store tools, produce, or whatever you’ve got lying around. Handles or hooks make them easy to carry or hang.
13) DIY Metal Plant Stand

You can throw together a sturdy plant stand with some metal tubing or whatever scrap you’ve got lying around. A basic frame with a flat top is usually enough to hold pots, indoors or out. If you’re leaving it outside, it’s worth double-checking the metal can handle rain and moisture.
Welding gives you a rock-solid build, but if you don’t have the gear, aluminum brazing or even brackets work in a pinch. Honestly, a few straight cuts and some screws can get you a decent stand without much fuss.
Paint or powder coat the metal so it won’t rust and to fit your vibe. Black or something neutral usually plays nice with most spaces, but hey, it’s your call.
14) Stamped Metal Spoons and Utensils

Old spoons and forks can get a second life when you stamp words or patterns into them. A simple stamping kit is all you really need to press letters or designs into the flatware.
It’s a fun way to label utensils, whip up some quick gifts, or just make something decorative. No fancy skills needed, just a bit of patience and a steady grip.
Try it out on a spare spoon first (trust me, it helps). Once you get the hang of the hammer and stamp, you can make custom sets that look pretty cool on a table or as little keepsakes.
15) DIY Metal Bird Feeder

A sturdy bird feeder is easy enough to make out of sheet metal, wire mesh, or even an old metal spool. Metal holds up to the weather, so you end up with a feeder that’ll last.
Cut and shape the metal into a simple container or tube. Add some holes or mesh sides so seeds stay put but birds can get at them.
Stick a hook or chain on top and hang it from a tree or post. With a bit of welding or even just some drilling, you’ll have a feeder that looks sharp and works well.
17) Handcrafted Metal Knife

You can turn a chunk of scrap metal into a functional knife with some basic tools and a bit of patience. Start by grinding or filing the metal until you’ve got the rough shape of a blade. If you’re new to this, keep the design simple, no need to go wild.
After you’ve shaped it, you’ll need to harden the blade by heating and quenching. That’s what gives the metal its strength. Once it’s hardened, polish and sharpen until it’s ready to use.
Finish it off with a handle, wood, metal, resin, whatever’s handy. Makes the knife safer and just feels better in the hand.
18) Welded Metal Picture Frame

Cut steel or aluminum to the size you want for a clean, sturdy frame. Straight cuts mean tight corners, and a miter joint gives things a sharper, more finished look.
After cutting, tack weld those corners to keep everything together. Double-check it’s square before you finish the welds. Grind the welds smooth for a neat finish.
When the frame feels solid, sand and paint it if you want a polished look. Add some clips or brackets on the back and it’s ready for glass and your artwork.
19) DIY Metal Toolbox
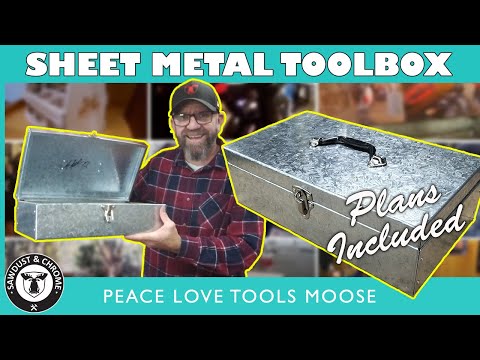
Building a metal toolbox is a great way to get a sturdy spot for your tools while learning the basics of metalwork. You’ll be working with sheet metal – measuring, cutting, and bending panels into shape.
You can fasten everything with rivets, screws, or spot welds, depending on what you’ve got in your shop. Don’t forget handles and latches, they make it a whole lot easier to carry.
It’s a hands-on project that gets you comfortable with cutting, bending, and joining metal. Plus, at the end, you get a box you’ll actually use around the garage.
20) Metal Jewelry Dish

A jewelry dish is simple, just grab a small sheet of metal or an old tray. Use a hammer to shape the edges and curve it a bit, and you’ve got a clean, functional spot for your stuff.
Stamp in some designs or patterns to make it yours. Letters, numbers, or just fun shapes with a metal stamping kit all add a nice touch.
If you’re into color, try a heat patina or a bit of paint for a different look. It’s a handy project for corralling rings, earrings, or whatever small things keep going missing.
22) Welded Metal Wine Rack

Make yourself a sturdy wine rack by welding together square or round steel tubing. The frame holds bottles securely, and you can size it up or down for your collection.
Cut your pieces to length and tack-weld them to keep things lined up. Once it looks right, finish the welds for strength.
If you want to hang it, add some brackets or flat bar for mounting. Prefer a freestanding rack? Weld on a stable base. Keep the design simple, it’s easier and still looks sharp.
23) Metal Key Holder from Scrap

Got leftover metal? Turn it into a simple wall key holder. Old wrenches, rebar, or scrap rods all work. Usually, a few welds or some sturdy screws do the trick.
Mount the metal to a wood base or just put it straight on the wall. For hooks, try bending nails or using cut-off bolts—keeps it cheap and practical.
Play around with finishes! Leave it raw, paint it, or give it a brushed look. Each one changes up the style, but it’ll always do the job.
24) DIY Metal Desk Organizer

You can piece together a desk organizer from scrap metal or old tin cans. Clean them up, smooth any sharp bits, and arrange them for pens, pencils, or whatever small tools tend to pile up.
Weld or screw the pieces for a sturdier build, but strong adhesive works if you’re in a hurry or just not into welding. Leave it plain or slap on some paint, it’s up to you!
It’s a nice way to reuse what you’ve got, and honestly, it keeps your workspace less chaotic.
25) Stamped Metal Bracelets

Stamped metal bracelets are easy to make with a few tools: letter stamps, a hammer, and some blank metal strips. It’s a fun way to add names, dates, or short words right onto the surface.
Go for a soft metal like aluminum or copper since they’re a lot easier to stamp. Put the strip on a steel block, line up your stamp, and give it a good whack.
Once your design’s set, bend the strip into a cuff shape using a bracelet mandrel or even a round pipe. A quick polish and you’re done! Simple, personal, and kind of addictive once you start.
26) Welded Metal Garden Trellis

Building a welded metal trellis isn’t as intimidating as it sounds. You can grab some steel rods, rebar, or even wire mesh. These materials are tough enough for any climbing plant you throw at them, so you won’t have to worry about things sagging or snapping.
Sketch out a rough idea of the trellis shape you want (doesn’t have to be museum-worthy), then cut your pieces to fit. Tack weld the frame together, double-check that it’s not all wonky, and finish off the welds when you’re happy with the shape.
A quick run with a grinder over the sharp edges helps avoid nasty surprises later. You can leave the metal as-is for that rugged, weathered vibe, or hit it with a protective coat if you’re not into rust.
27) DIY Metal Lanterns

Making your own metal lanterns can be as simple or fancy as you like. Perforated sheets, old tin cans, or those galvanized buckets collecting dust in the garage all work. Punch out some holes or patterns, and suddenly you’ve got light dancing around the room in all sorts of cool ways.
If you’ve got an old lantern lying around, try sanding it down, maybe add a coat of paint, or swap in some new glass panels. Suddenly it feels brand new – no need to buy another one!
For the quickest version, just grab a metal bucket, drop in a candle or LED, and drill a few holes for air and a bit of style. In no time, you’ll have a functional lantern that actually looks pretty good.
28) Metal Wall Clock from Scrap

Scrap metal clocks? Honestly, they’re cooler than they sound. Leftover sheet metal or steel strips can turn into a wall clock with a lot of personality, those dents and marks become part of the charm.
Cut your metal into whatever shape you’re feeling (circle, square, or something weird if you’re brave). Drill a hole in the middle for the clock mechanism, pop on the hands, and you’re halfway there.
Numbers or markers are totally up to you. Weld, paint, or even stamp them on if you want, but sometimes a minimalist look works better. Either way, you end up with a sturdy clock that’s actually useful and a little bit artsy.
29) DIY Metal Business Card Holder

A business card holder made from scrap metal? Why not. Grab some old cutlery, random nuts, or leftover tool bits – honestly, the weirder the better. A quick weld or just a bend here and there, and suddenly you’ve got a desk piece with character.
Using stuff like an old drill chuck or screwdriver bits gives it that industrial vibe without much extra work. Those shapes already catch the eye, so you don’t have to overthink it.
If you’re not in the mood for heavy lifting, just bend a flat metal strip into a U-shape. It’s fast, simple, and still looks pretty sharp on your desk.
30) Welded Scrap Metal Animals

Got a pile of old bolts, gears, or random chains lying around? You can actually turn that junk into small animal sculptures with a welder and a bit of time. If you’re just getting started, birds or fish are a good bet, they don’t need a ton of parts, and balancing them isn’t too tricky.
Once you’ve played around a bit, you might want to tackle something bigger, like a dog or even an owl. Mixing up the metal textures really brings these creatures to life, if you ask me. There’s something about the contrast that just works.
One thing I’ve learned: weld the pieces together where they really connect, not just wherever’s easiest. Even the tiniest sculptures can stick around for ages if you take your time making those joints strong.