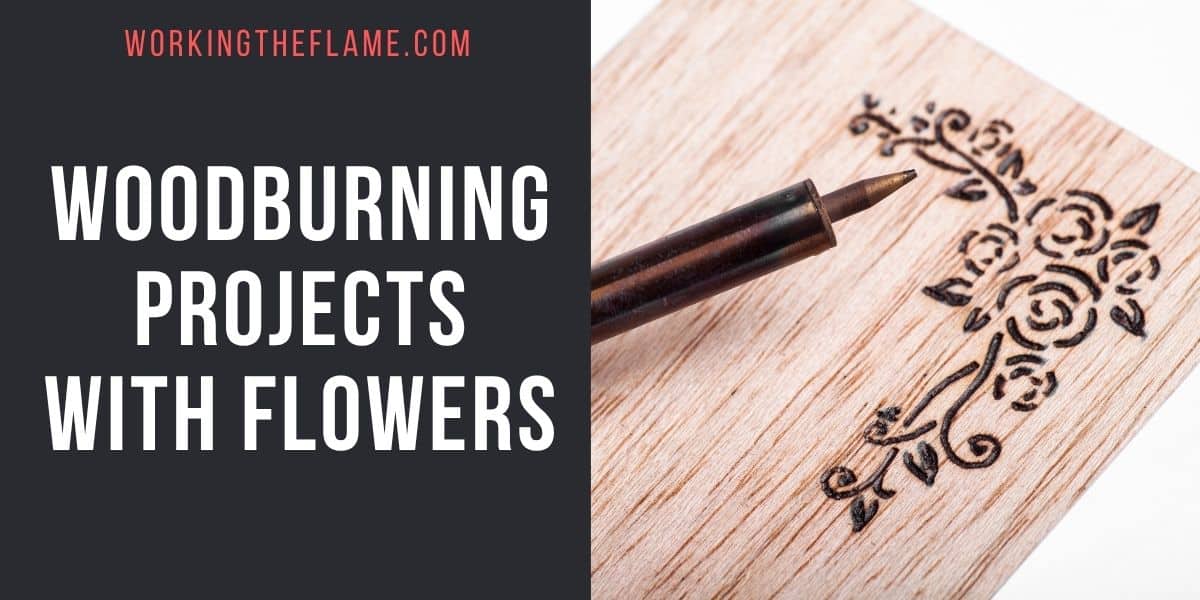
Woodburning with floral designs is a relaxing, creative way to bring nature into your projects. There’s something satisfying about turning plain wood into something personal and detailed with just a few tools and a bit of patience. You’ll pick up how to shape flowers, leaves, and stems with careful burns that let the wood’s grain peek through.
Each project here highlights a different flower, ranging from quick outlines to more intricate patterns. As you work through these, you’ll see your skills grow and your collection of floral pieces expand. It’s kind of nice to look back and see the progress, as your hand gets steadier, and you start to get a feel for the woodburning tool.
1) Simple Daisy Woodburning Design

Grab a small wooden plaque or maybe a coaster; something light and smooth works best. Sand it down so your tool glides nicely, which really helps keep your lines clean. Daisies are a solid choice for beginners because their shape is easy and instantly recognizable.
Lightly sketch out your flower in pencil before you start burning. Keep your hand steady as you outline the petals and center. Medium heat is usually enough; high heat can just make a mess of the details.
Try shading the petal edges or darkening the center if you want a bit more texture. You could leave the background plain, or add a few leaves for a little contrast. Definitely finish with a clear sealant so your work lasts.
2) Intricate Rose Pattern Project

A rose design can look fancy without being overwhelming. Start by sketching an outline of the petals, and try to keep it loose and natural, not too stiff.
Go for a fine tip on your pyrography pen for those edges, then swap to a medium tip for some gentle shading. Play with the heat setting to get the tone and depth you want.
Take your time with each petal, especially the inner folds, as those little shadows really make it pop. Wipe the wood clean between burns; it keeps your lines looking crisp.
3) Sunflower Silhouette on Birch Wood

A sunflower silhouette on birch wood is surprisingly striking. Trace a simple outline onto the wood – birch is great because the light grain really makes your burn lines stand out. Try to keep the petals wide and spaced out for a balanced look.
Medium heat is usually enough for the outline, and you can darken the center for a bit of drama. A fine-tip pen works best for those petal edges. Top it off with clear polyurethane to keep the design sharp and show off the natural wood.
4) Lavender Sprig Diffuser

Woodburning a single lavender sprig onto a small piece of wood turns it into something both decorative and functional. Focus on delicate stems and tiny clustered buds to keep the design looking light and natural. A fine tip works best for capturing those soft details.
After the burning is complete, use a cotton swab to gently dab lavender essential oil onto the etched leaves. The wood absorbs the scent beautifully, creating a subtle, long-lasting diffuser.
Finish it off by threading some twine through a small hole at the top so it can hang in a closet, car, or by a bedside. It’s a simple project that blends calming fragrance with handcrafted charm.
5) Cherry Blossom Branch Wall Art

Burning a cherry blossom branch across a wood panel brings a bit of spring indoors. Lightly sketch the branch, then use a fine-tipped burner for the petals and a slightly higher setting for the bark.
Scatter a few blossoms along the branch for a balanced look. You could leave the wood bare for a soft contrast or seal it if you want to keep it protected.
Hang it in a hallway or bedroom for a subtle, nature-inspired touch, no need for paint or printed decor.
6) Wildflower Meadow Scene

Imagine a flat wood panel filled with little blooms scattered like a spring meadow. Sketch a mix of daisies, lavender, and some grasses before you burn. Keep your strokes light so the flowers stay airy and natural.
A fine-tip burner is perfect for defining petals and stems without overdoing the darkness. Try layering soft tones for more depth.
Seal the surface with a clear coat once you’re finished. It keeps the lines crisp and your work safe from fading.
7) Poppy Flower Coaster Set

A set of poppy flower coasters is a fun project for small wood slices and a wood-burning pen. Lightly trace your poppy pattern so your lines stay even.
Outline the petals first, then shade the centers for a bit of depth. Short, steady strokes help keep the details clear.
Once you’re done, seal each coaster with a thin coat of clear finish. The poppy design feels calm and works for everyday use or as a small handmade gift.
8) Witchy Herb Hangings

Designing a witchy scene on a wooden plaque is a beautiful way to lean into that mystical, cottagecore vibe. Start by sketching a softly curved witch hat as your focal point, then add bundles of hanging herbs and wildflowers underneath for a touch of earthy detail. A crescent moon in the background ties the whole piece together and gives it that dreamy, nighttime feel.
Take your time layering in fine lines for the stems and petals so the scene feels delicate and balanced against the wood grain. You can leave the plaque natural for a rustic look or lightly darken the edges to frame the artwork. It’s a cozy, magical piece that feels like it belongs in a little apothecary nook.
9) Tulip Outline for Beginners

A simple tulip outline is a great way to practice steady lines and smooth curves. The shape is easy to sketch or trace, so you get a clear guide before burning.
Keep your burner at a medium temperature for even lines, no need to scorch the wood. Light pressure helps with clean outlines.
Once you’re comfortable, try adding a little shading near the petals or stem. It’s a good way to see how temperature and pressure change the look of your burn.
10) Vine and Leaf Border Frame

A vine and leaf border can turn a plain wooden frame into something a little more special. Those flowing lines and small leaves are simple, but they add a nice natural touch.
Sketch your design first with pencil or graphite paper. It’s easier to keep things even that way.
If you want, add tiny flowers or swirls between the leaves for more detail. The finished border gives the frame a clean, handmade feel; great for photos or other wood-burned art!
11) Magnolia Flower Centerpiece

Mixing woodburning with a floral design, you can create a magnolia flower centerpiece on a wooden base. Burn a simple outline of magnolia petals, keeping the lines smooth. The wood’s natural grain gives a soft background that goes well with the broad, curved shapes of the flower.
After burning, seal the surface with a clear finish. Arrange some real or artificial magnolia leaves and blooms around the base for a nice mix of natural texture and handmade detail.
12) Flower Coasters Set

A flower themed coaster set is easy and looks great. Burn the outline of the petals onto a small wood slice or cutout. The broad petals and central stamen give you plenty of room to play with shading.
Use a fine tip for the petal edges, and a medium tip to add depth near the center. It helps the flower look balanced without making things too complicated.
13) Floral Rolling Pin

Wood burning a floral pattern onto a rolling pin turns an everyday kitchen tool into something beautifully personal. Wrap a flowing vine or scattered wildflowers around the barrel so the design reveals itself as the pin rolls. Simple petals and leafy sprigs work especially well and complement the natural curve of the wood.
Once finished, a light coat of food-safe mineral oil helps the grain stand out and keeps the surface protected. Whether it’s displayed on a shelf or actually used for baking, it adds a soft, handcrafted touch to the heart of the kitchen.
14) Flower Bookmark with Tassle

A woodburned bookmark with a floral design is a simple way to make something special. The flower’s tall petals and clean lines really stand out on light wood.
Sketch the outline with pencil first, then burn the shape slowly to keep things smooth. Add shading in layers so the petals have depth but don’t get too dark.
If you’re feeling creative, press a real petals into the wood with clear sealant after the burning cools. It adds a natural touch and keeps the bookmark smooth for daily use.
15) High Contrast Floral Art

Creating a floral design with woodburning and then painting the background a deep, inky shade gives the whole piece incredible contrast. Start by burning in the flowers and leaves with clean, confident lines so the details stand out clearly against the wood grain.
Once the design is finished, brush a rich dark color like charcoal, navy, or black around the florals, letting the natural wood remain untouched. The lighter blooms pop dramatically against the moody backdrop, almost like they’re glowing. It’s a striking blend of rustic texture and bold, modern contrast that really makes the artwork stand out.
16) Orchid Jewelry Box

A plain wooden jewelry box can get a bit of charm with a orchaid burned across the lid. I usually start by sketching a few daisies in pencil – nothing fancy, just enough to keep things even. Try to keep the petals spaced so the chain doesn’t look lopsided.
For the outlines, a fine-point tip works best. If you’ve got a shading tip handy, use it to add a little depth to the flower centers and leaves. Take your time, as rushing tends to scorch the wood and mess up the lines.
Once you’re done, seal the box with a clear coat. It’ll keep the design sharp and help the wood stand up to everyday use.
17) Floral Moon-Shaped Decor
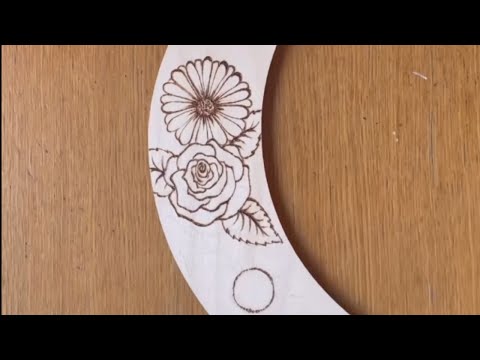
Shaping a piece of wood into a crescent moon instantly gives your project a soft, celestial feel. Burn delicate florals along the curve of the moon, letting the petals and leaves follow its natural arc so the whole design feels balanced and intentional.
You can keep the lines fine and airy for a subtle look, or deepen certain areas with shading to add more dimension. Left in its natural wood tone, the contrast between the smooth grain and the detailed florals feels warm and organic. It’s a gentle blend of botanical beauty and lunar charm that works beautifully as wall decor.
18) Lotus Flower Meditation Sign

If you’re up for something peaceful, try woodburning a lotus flower with gentle, balanced lines – a design that just feels right for meditation or a quiet nook. The lotus has always struck me as a symbol of growth and calm, and it just fits.
Cedar or birch works well for this, honestly. The grain’s usually smooth enough that your burn lines won’t get all wobbly. I’d swipe on a bit of Danish oil or maybe just a clear sealer; it keeps everything crisp and helps the wood last.
Find a cozy spot, maybe by your yoga mat or wherever you like to unwind, and hang it there.