
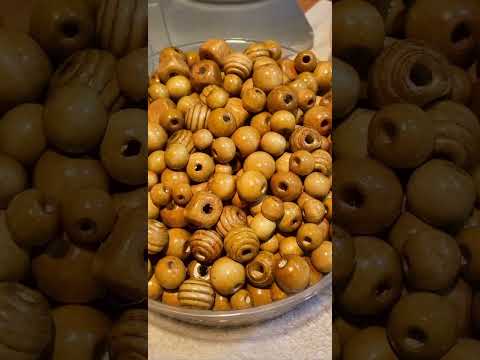
Wood beads are such a simple way to add a personal, creative touch to everyday things around the house. Their natural vibe just seems to work with so many styles, whether you lean rustic, modern, or just want something a little playful. Even plain wooden beads can turn into functional pieces or quirky accents that give your space a bit more character.
With a few basic supplies and a bit of inspiration, you’ll find it’s easy to come up with projects that fit your home, the season, or even make great handmade gifts. Some are just little accessories, others are more of a statement, but all of these ideas show how surprisingly versatile wood beads can be (and you don’t need fancy skills, either).
1) Wood Bead Garland for Rustic Home Decor

Making a wood bead garland is about as easy as it gets, just beads, some string, and scissors. Thread the beads onto twine or jute cord, then tie off the ends so nothing slides off.
Drape your garland over a mantel, wrap it around a vase, or just let it hang from a shelf. The natural wood tones blend right in with farmhouse or rustic looks.
If you want to add a little something extra, try small tassels, bells, or a tag for more detail. It’s super flexible, so you can tweak it for the season or your mood.
2) Boho Style Wood Bead Chandelier

If you’re after a relaxed boho vibe, try making a chandelier with wood beads. Usually, you’ll start with a basic frame, embroidery hoops or maybe an old light fixture.
Thread beads onto wire, string, or twine, and drape them around the frame in layers. Mixing bead sizes helps it look more organic.
You can spray paint the frame or beads for a different finish, or just leave the wood raw for a simple farmhouse feel. It’s way more affordable than buying one, and honestly, it looks just as good.
3) Wood Bead Mirror Frame

Give a basic mirror a little upgrade by outlining it with wood beads in a raindrop pattern. The curved shape is soft but still stands out.
Go for unfinished beads so you can stain or paint them however you like. Just glue each bead right onto the frame, keeping the spacing even for that raindrop look.
This works especially well with round mirrors, but you can totally adjust it for squares or rectangles. It’s a budget-friendly piece that feels custom without a ton of effort.
4) DIY Wooden Bead Curtain Tiebacks

Making curtain tiebacks with wooden beads is honestly a breeze. Just string some beads onto cord or rope; paint them if you want, or leave them natural.
Try mixing up bead sizes for a little more texture. A couple of larger beads spaced between smaller ones give them a nice look with barely any extra work.
If you’re feeling it, add tassels from yarn or twine at the ends. That little touch makes the tiebacks feel more finished, but still keeps things quick and simple.
5) Abstract Wall Art with Wooden Beads

Turn plain wooden beads into wall art by arranging them in whatever pattern or shape you like. Use a canvas or wooden board as your base, and glue the beads right on.
Mixing bead sizes adds some depth. Leaving them natural gives that clean, Scandinavian feel, but painting them is always an option.
Play around with geometric layouts or just random clusters until something clicks. It’s budget-friendly and honestly doesn’t take much time at all.
6) Wood Bead Napkin Rings

Simple napkin rings are easy with just a handful of wood beads and some twine or wire. It’s quick, and you don’t need much.
Thread beads onto a pipe cleaner, wire, or sturdy cord until you’ve got a full loop. Twist or tie the ends to hold it together.
For a different look, paint the beads before stringing them, or mix up the bead sizes. You could swap out twine for ribbon if you want to match a holiday table.
7) Hanging Planter with Wood Beads

A hanging planter with wood beads and cord is easier than it looks. Cut a few equal lengths of cord, thread beads onto each, then tie them together at the base to hold your pot.
Use different bead sizes for a bit of texture. You can leave them unfinished or paint them to match your style.
Hang the planter from a hook. The beads dress up the cords and help keep everything in place while supporting your plant.
8) Wood Bead Keychains with Tassels

For a quick project, make a wood bead keychain. You’ll just need a few supplies: natural beads, cord, and a keyring. Add a tassel for a softer look (and so you can spot your keys faster).
Paint the beads for a pop of color, or stick with natural for a simple vibe. Different bead sizes help the keychain look more balanced.
Tie the tassel with embroidery floss, suede, or yarn, and attach it to the keyring. It only takes a few minutes once you’ve got your stuff together.
9) Wood Bead Snowman Ornaments

Turn plain wooden beads into snowman ornaments. Just string three beads together for the body, then tie twine or cord at the top for hanging.
Paint on eyes, buttons, and a carrot nose with markers or craft paint. Scraps of felt or fabric make perfect scarves and hats.
These are quick to make and fun for kids to help with. Hang them on your tree, add one to a garland, or tie it onto a wrapped gift for an extra touch.
10) Wood Bead Fairy Doll Crafts

Fairy dolls are easy – just combine wooden beads with pipe cleaners, felt, or fabric scraps. The bead is the head, pipe cleaners make the body and arms, and a bit of yarn or thread becomes hair.
Add wings from fabric or paper cutouts for that fairy look. You can paint on tiny faces, or just leave them blank for a minimalist style.
They’re cute as decorations, party favors, or crafts for kids. Supplies are cheap, so you can whip up a whole bunch in different colors.
11) Seasonal Wreaths with Wood Beads

Seasonal wreaths with wood beads are totally doable. Start with a wire or embroidery hoop for the frame, then string round beads all the way around for a clean base.
Change out greenery, flowers, or ribbons to match the time of year: spring florals, autumn leaves, or holiday accents all work. No need to redo the whole thing every season.
Use natural, painted, or stained beads to change up the look. It’s easy to update whenever you want something fresh.
12) Wood Bead Pendant Lighting

Jazz up a plain pendant light by threading wooden beads along the cord. Large round beads work, but mixing sizes makes it more interesting.
A cloth-covered wire or vintage-style bulb can give it that rustic or retro feel. Paint the beads or leave them natural, it’s up to you!
All you need is a simple pendant kit, beads, and a bit of patience. Once it’s put together, you’ve got a custom light that didn’t cost a fortune.
13) Wood Bead Coasters

Make some coasters by stringing wooden beads together into a flat circle or square. The gaps between beads help with airflow, so your table doesn’t get all sweaty.
Mix up bead sizes or colors for a little variety. Neutral tones are classic, but painted beads can tie in with your decor.
You just need beads, cord, and scissors. They’re practical, reusable, and add a handmade touch to your table setup.
14) Wooden Bead String Art

If you want to shake up your usual string art, try adding some wooden beads along the threads. They bring a bit of texture and depth.
Start with a simple shape outlined on a board using small nails. As you wind the string, just slide beads onto it wherever you think they’ll look good. No need to overthink it – patterns or random accents, both can work.
Play around with different bead sizes and colors. Maybe some natural wood mixed with painted ones? It doesn’t have to be fancy to make the whole design pop.
15) DIY Wood Bead Curtain
Making a wood bead curtain is pretty straightforward, just string beads onto strong thread or fishing line, then attach the strands to a rod. It works as a room divider or a fun doorway accent, and honestly, it’s kind of nostalgic.
You can go with all one bead size for a tidy look, but mixing sizes adds a bit more life. Natural wood is always nice, but painted beads can bring in some color if that’s your thing.
Hang the rod from the wall or ceiling, wherever you want the curtain. Adjust the strand lengths so they fit your space and don’t end up dragging on the floor.
16) Wood Bead Photo Frame Embellishments

Adding wood beads to a plain frame is a quick way to give it some charm. Even just a row of round beads glued along the edges can make the whole thing look less flat and a lot more interesting.
You can paint the beads before gluing if you want everything to match, or leave them natural for a softer, more relaxed vibe. Both styles work, depends on the photo and where you’re putting the frame.
For a playful touch, try mixing bead sizes or brushing on a light stain to bring out the wood grain. It’s a small change but somehow makes the frame feel way more personal.
17) Wood Bead Mobile for Nursery

A nursery mobile made with wooden beads, string, and a hoop is simple and calming; the best combo for a baby’s room. You can leave the beads natural or paint them soft colors to match the space.
If your beads don’t already have holes, you’ll need to drill some, then thread them onto twine or cord. Space the strands evenly around the hoop so the mobile hangs straight.
Just make sure to hang it securely from the ceiling and keep it out of reach. It’s a sweet, handmade touch for the nursery without much fuss.
18) Wood Bead Curtain Pulls

Making curtain pulls with wooden beads is honestly pretty satisfying. Just string a few onto sturdy cord or twine. Pick sizes that feel good in your hand so they’re comfy to use.
You could mix natural wood tones with some painted beads if you want a bit of color, or just leave them plain for a minimal look. Both are nice, depending on your style.
Tie the beaded strand to your curtain or rod with a knot or a small hook. It’s a simple way to add a little detail that’s also practical.
19) Wooden Bead Table Centerpiece
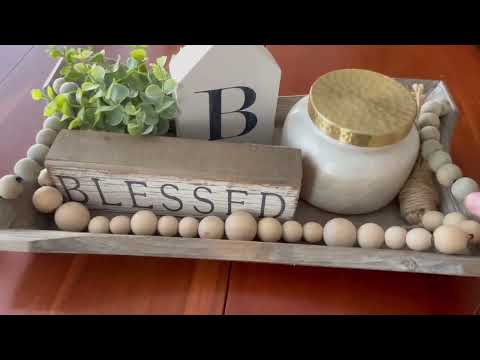
A wooden bead centerpiece is about as easy as it gets! Just string beads together and shape them into a circle or a layered strand. Pop it around a vase, candle, or bowl for a clean, natural look on your table.
Mixing bead sizes gives it more dimension. Bigger beads can outline the centerpiece, while smaller ones fill in the gaps and soften the whole thing.
If you’re after some color, just paint or stain the beads ahead of time. Neutrals are always classic, but muted or seasonal shades can tie in with your table setting if you want to switch things up.
20) Wood Bead Pumpkins

Add a touch of cozy, natural charm to your fall décor with these adorable wood bead pumpkins! They’re simple to make, budget-friendly, and perfect for decorating mantels, tables, or entryways.
Start by threading wooden beads onto flexible wire or pipe cleaners – choose bead sizes that fit the look you want. Once you’ve made a few bead strands, shape them into circles and twist the ends together to form the pumpkin’s round body. Stack or layer several loops to create a fuller shape.
For the stem, insert a small wooden dowel, cinnamon stick, or twig into the center and secure it with hot glue. Add a bit of twine, ribbon, or faux greenery for a finishing touch.
In just a few minutes, you’ll have a set of charming, neutral-toned pumpkins that bring warmth and texture to your seasonal décor—no carving required!