Wood burning is one of those hands-on crafts that lets you turn a plain chunk of wood into something way more personal. Whether you’re looking to jazz up your home or whip up small gifts, pyrography gives you a chance to add a little character with just a handful of simple designs and a steady hand.
There’s no shortage of inspiration out there, whether you’re into rustic signs or tiny keepsakes. These project ideas are meant to help you practice control and get creative, and you’ll actually end up with something useful (or giftable) at the end.
1) Decorate wooden spoons with floral patterns

Take some plain wooden spoons and add a little life by burning floral designs onto them. Petals, leaves, even a few winding vines, pyrography makes it easy to give these kitchen basics a natural, handmade vibe.
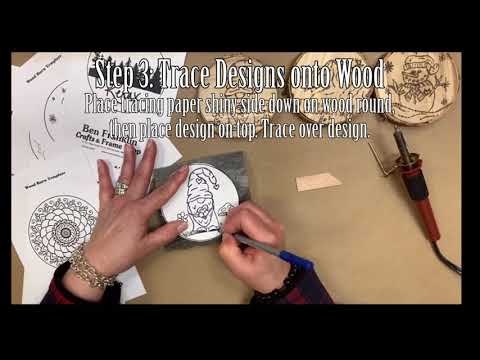
Start by sanding the spoon so it’s smooth, then sketch your design in pencil. Trace over it with a wood-burning pen, keeping your strokes slow and steady.
If you’re just getting started, try small flowers or repeating leaf shapes. They’re pretty forgiving, and honestly, a little imperfection just adds charm.
2) Create personalized coasters
Give those basic wooden coasters some personality by burning creative patterns into them. Straight lines, triangles, hexagons are all easy to map out with a ruler and pencil before you go in with the heat.
Play around with thick and thin lines for a bit of contrast. Even something as simple as a grid can look sharp, especially when the wood grain peeks through.
Don’t forget a clear sealant at the end to keep your design safe from moisture. These are practical, but they still show off your wood-burning skills.
3) Burn simple silhouettes on keychains

Grab some small wooden keychains, as they’re easy to hold and perfect for quick projects. Smooth wood is best so your lines come out clean.
Sketch a simple animal outline then burn it in. Keep it bold and minimal since you don’t have a ton of space to work with.
A fine-tip pyrography pen helps with sharp edges. Start light, darken as you go. A quick coat of sealant will keep your keychain looking fresh.
4) Make custom wooden bookmarks with initials
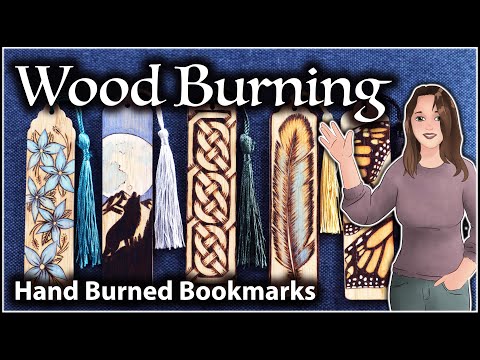
Turn wooden strips into neat bookmarks with a pyrography pen. Sand them first so your lines stay crisp. Bamboo or basswood are both easy to burn and look nice.
Pencil in your initials or a short name before you start. Block letters are a breeze for beginners, but cursive has a softer feel if you’re up for it.
Once you’re done burning, add a thin coat of clear finish. Punch a hole at the top and tie on a ribbon or cord for a little flair.
5) Design rustic sign boards

Burn a short motivational quote onto a piece of wood and you’ve instantly got something meaningful for your wall. Keep the lettering clean and easy to read so the message pops.
Reclaimed or lightly sanded wood gives a rustic vibe, and the grain adds a nice touch behind the burn marks. A matte finish keeps it feeling handmade.
It helps to sketch out your quote first in pencil, as spacing and alignment can be trickier than you’d think.
6) Etch mandala patterns on small plaques

Burning mandala patterns onto small wooden plaques is oddly relaxing. The circles and symmetry help you practice keeping your lines even and your hand steady.
Start with a pencil sketch, as it’s way easier to follow and tweak before you commit with heat. There are plenty of free mandala outlines online if you’re not feeling super creative.
Once you’re finished, a bit of wood finish or sealant makes the pattern stand out and keeps dust off.
7) Add leaf motifs to picture frames

Take a plain wooden frame and give it some life with burned-in leaf shapes along the edges. Maple or oak leaves are easy to sketch and instantly recognizable. Pencil in your pattern first so it feels balanced.
Mix up big and small leaves to keep things interesting. Use short, quick strokes to make veins and edges.
Seal it when you’re done to protect your work and bring out the wood grain. Suddenly, your photos look way more special.
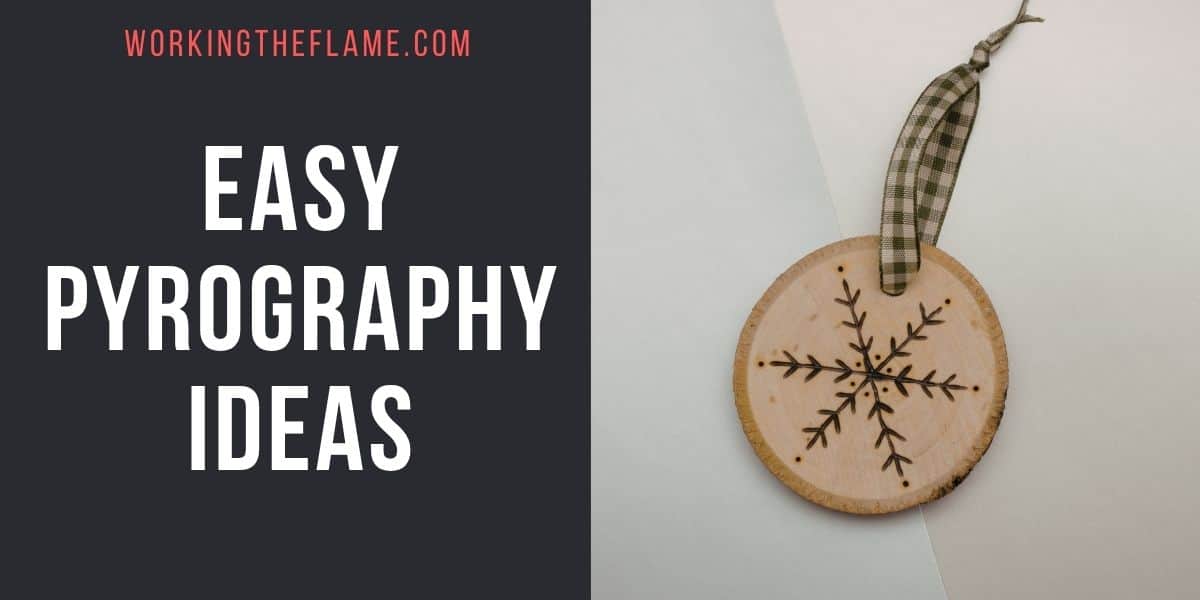
8) Craft holiday ornaments with snowflake designs

Make wooden ornaments festive by burning in snowflake designs. Use a fine-tipped pen for those six-pointed shapes or geometric lines, as lighter strokes work best for delicate details.
If you want, mix in a bit of color with watercolor or metallic paint after the wood cools. It adds a wintry pop without being over the top.
Hang them on your tree or tie them to gifts. Quick, easy, and a nice personal touch for the holidays.
9) Burn floral patterns on wooden jewelry boxes

Give a plain jewelry box some attitude with abstract shapes or flowing lines. This is a good project if you want to focus on movement instead of perfect symmetry. Lightly sketch your ideas first to keep things loose.
Play with curved lines, dots, angles, and switch up your burner tips for different textures. A few darker spots can add depth without overpowering the design.
Go easy on the pressure and keep your hand steady. Finish with a light coat of wax or oil to protect the surface and show off the grain.
10) Personalize cutting boards with family names

Turn a regular cutting board into a keepsake by burning your family name right on it. You can use a stencil or just sketch it out with pencil first. A bold, clean font is easiest to read.
Add little accents like leaves or geometric borders if you want to dress it up.
Finish with food-safe oil to protect the wood and make your design pop. Personalized boards make awesome gifts for weddings or housewarmings.
11) Make custom wooden magnets with simple icons

Got some small wood slices lying around? You can turn them into handy magnets just by burning simple little icons onto the surface. Think circles, leaves, stars, or even someone’s initials – easy to sketch, and you don’t need to be a pro to make them look good.
Once your design cools off, just glue a small magnet to the back. They’re perfect for sprucing up a fridge or whiteboard, and honestly, they make cute little gifts too.
It helps to outline your icon in pencil first. That way, you can keep your lines even and catch any wobbles before you start burning.
12) Create monogrammed wood tags for gifts

Personalizing wooden tags is honestly one of the easiest ways to make a gift feel special. Just burn a single initial or a short name onto small wood slices, luggage tags, or thin plaques.
Sketch the letter in pencil, then trace it with your wood-burning pen. Try out different fonts or maybe add a little border to mix things up.
Tie on a short string or a ribbon so the tag can hang from a bag or box. They’re simple, but people tend to keep them as mementos.
13) Etch compass designs

You could freehand a basic compass outline, or just print one out and trace it if you’re not feeling especially confident. A fine-tipped pyrography pen is your friend here, as it’ll help you get those crisp lines for the circle, points, and letters.
Maybe add a bit of shading around the edges if you’re feeling ambitious. When you’re happy with it, give everything a quick coat of clear varnish so your design actually lasts.