
Best Pyrography Kits & Best Wood Burning Kits for Beginners
Learning pyrography can be intimidating for beginners due to the wide range of tools and materials available on the market today. With so many choices, how do you know that you are choosing the tools that are appropriate for your skill level and artistic style?
Luckily, companies specializing in wood burning offer starter kits online that are curated for different skill levels. Instead of wasting time researching different tools and wood types, kits allow you the dive into the artform right away for an affordable price.
Best Pyrography Starter Kits? We Recommend:


What’s Included in Beginner Pyrography Kits?

Most starter kits include the very basic materials needed to get started, and some extra tools that will be helpful as you progress in pyrography. Below are some of the most common tools and materials included in wood burning kits.
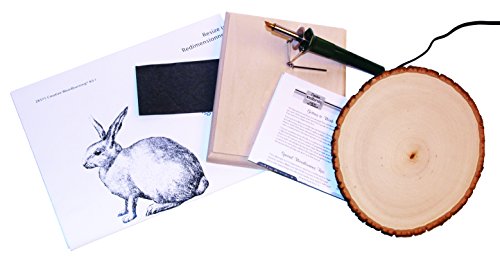
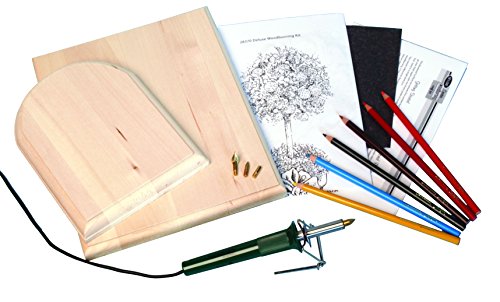
1) Pyrography Machine

Moderately priced (“complete”) kits will include a pyrography machine that provides additional heat settings for wood burning.
Basic pyrography kits will include a pen which plugs straight into the mains supply and runs at just a few basic settings, but having a pen attached to an adjustable control unit provides extra voltage settings for more advanced techniques and allows you to take pressure off your pen tips.
2) Pyrography Pen & Holder
Kits also include one pyrography pen which can be customized with interchangeable wood burning pen tips. Pyrography pens resemble those used for writing and attach to the pyrography machine via a cord. Pens have a grip for easy handling.
A pen holder is a handy item to have in your workspace as you collect more pens and tips. Lots of kits include them. Most pen holders are made of wood and can be customized with your own wood burning art.
3) Pen Tips & Stencils
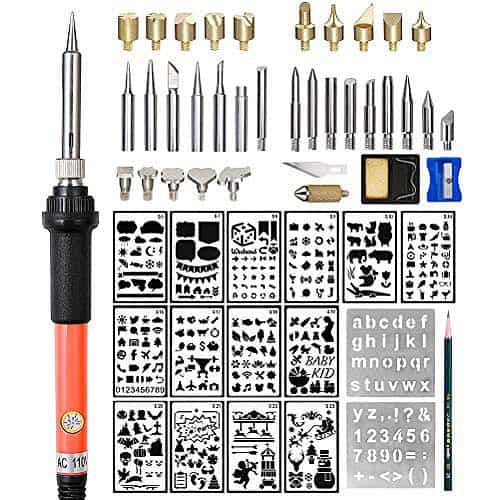
Most kits come with interchangeable pens and pen tips. Tips come in a range of shapes for different projects and techniques. Kits include basic pen tips that are appropriate for many beginner techniques. Kit tips allow you to make lines, shading, divots, and other beginner level pyrography designs.
For beginner pyrographers, stencils can be great for practicing linework and shading. Wood burning stencils resemble those used for other types of art, with outlines of letters, shapes, animals, and more.
Do I Need Anything Extra to Start Pyrography?
While kits offer the very basic tools needed to begin wood burning, there are several items that are not usually included that beginner pyrographers should invest in to finish their first projects safely and effectively.
1) Mask & Glasses

- WIDE APPLICATION RANGE PC lens has high light transmittance. It can be used in various situations...
- Adjustable temples: The length of the temples can be adjusted, so that regardless of the face or...
- High-definition anti-fog field of vision: double-layer coating, strong hardness and abrasion...
A protective mask is an important safety item that beginner pyrographers should invest in, especially if you have respiration problems. Because pyrography involves burning the top layers of wood, which produces small amounts of fumes, having extra breathing protection can be helpful.
Basic masks with a FFP1 or FFP2 filter are useful for removing toxins from the air and can be bought online for a range of prices. Beginners who are serious about wood burning, or those who have breathing diffuclties, should consider investing in moderately priced masks to ensure they last.
Lastly, if you have sensitive eyes, a pair of heat resistant safely glasses can be very helpful for preventing fumes coming in direct contact with eyes and causing irritation.
2) Desk Fan

- Small floor or tabletop fan: Honeywell TurboForce Air Circulator Fan is a cooling fan that is...
- Feel the power: Honeywell TurboForce fans have an aerodynamic turbo design to maximize air movement...
- Customize your comfort: With 3 speeds and a 90° pivoting adjustable head, you’ll always be...
Pyrographers should keep a small fan near their workstation to help circulate air and prevent dust and fumes from being inhaled. Coupling a workstation fan alongside a mask is the best way to ensure you’re safe during long pyrography sessions in a small room.
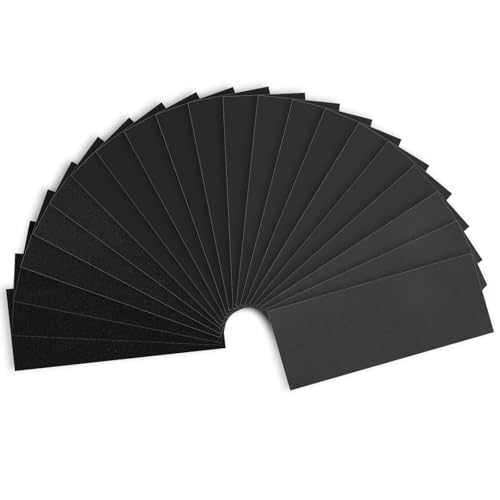
3) Sandpaper
- Multi-Stage Sandpaper Assortment: This Shineboc 9x3.6 inch sandpaper pack includes 21 sheets with...
- Premium Material: Crafted from high-quality silicon carbide, it is electrostatically coated to...
- Wet and Dry Use: It can be utilized for both wet and dry sanding. Wet sanding helps reduce the...
Kits often do not include sandpaper, which is a must-have tool for pyrography artists. Sandpaper is essential in the finishing stages of the wood burning process. Sandpaper helps smooth away mistakes, prepares wood for oil or other sealants, and removes any carbon buildup that may occur during the burning process.
Keep a range of grits available in your work space to accommodate for different projects.
4) Polyurethane and Oil

- PROTECT WOOD SURFACES – Minwax Polyurethane Wood Finish protects interior projects like woodwork...
- OIL-BASED DURABLE FINISH – Clear finish provides long-lasting protection and warm beauty to both...
- SATIN SHEEN – Give your wood projects a sleek finish with this satin clear varnish. It not only...
Most pyrographers apply a finishing product like polyurethane or tung oil to their finished products to seal their work and protect the wood for years to come. These products are both good options for protecting wood and sealing out dust and dirt.
Both products may darken wood surfaces, so make sure to apply a light coat with a soft cloth. You can find protective products at hardware stores and online.
What Can I Make with Beginner Pyrography Kits?
YouTube is a great resource for beginners looking for wood burning tutorials and project ideas.
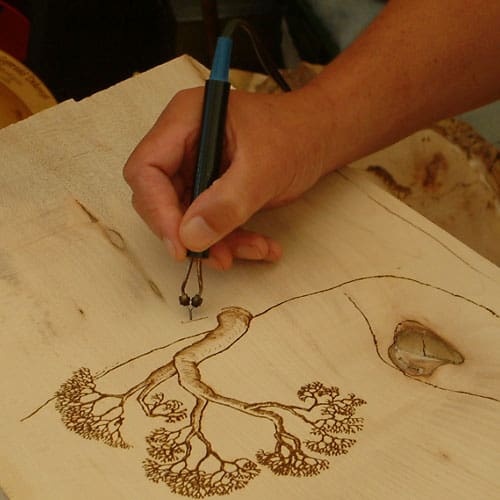
Below is a beginner-friendly pyrography tutorial using a stencil. The artist explains how to transfer the image onto wood, how to burn the image, and includes some helpful tips along the way.

Video Instructions:
Begin by placing your stencil design onto a piece of wood and secure it with tape. Place carbon paper under the stencil and trace the stencil with a pencil. Remove the stencil and begin prepping your tools.
You will need sandpaper, a shader tip, a lettering tip, and a straight-edge tip for outlining. Sand down the tips to remove carbon buildup if they have been used previously. Begin working with the shader tip and turn your machine onto a 5 heat setting or whatever high heat setting your machine has.
For this project, the artist uses a specific rooster stencil, but you can use whatever stencil you have and apply the techniques to your pattern. Shade first, then use your outlining tip to trace any lettering that may be in your stencil. Fill in letters with your lettering tip and your project is complete! Sand and apply finishing products according to your personal preferences.