
String is honestly way more versatile than it gets credit for. With just a few nails, a board, and a bit of patience, you can whip up designs that bring a little personality to your space, without emptying your wallet. It’s pretty fun to see how creative projects can come together with just some string, adding color, shape, and style to your home.
You’ll notice how everything from simple geometric patterns to more organic shapes can take form with only thread and a steady hand. Want something bold and modern? Or maybe something a little softer? There’s plenty of room to play, and you can make each piece feel like it really belongs to you.
1) Heart-shaped string art on wood
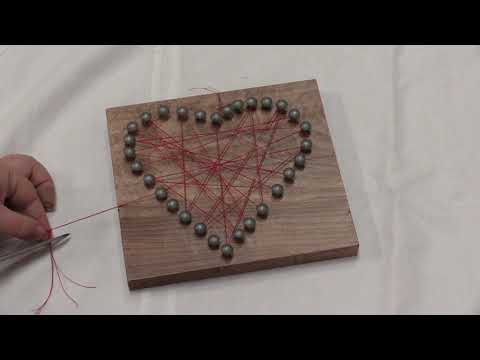
Grab a wooden board, a hammer, and some small nails. Print or sketch a heart, lay it on the board, and tap nails all the way around the outline. Don’t drive them in too far, as you’ll need room to wrap your string.
Tie your string to one nail and start wrapping it across the heart. You can crisscross at random or stick to a more organized pattern. The more you layer, the bolder it looks.
Once you’re happy with it, tie off the end and trim any excess string. Hang it up or give it to someone – handmade gifts are always appreciated!
2) Geometric polygon string art

For polygon string art, just mark out points for a triangle, square, hexagon, whatever shape you like. Each dot is where a nail or pin will go.
Once the nails are in, start connecting them with string in whatever order feels right. Changing up the sequence as you go creates all kinds of cool effects.
Try a single color for a crisp look, or go wild with a few shades if you want it to pop. It’s honestly hard to mess this one up.
3) Animal silhouette string designs

Animal outlines with string and nails look surprisingly modern. Birds, cats, and deer are popular because their shapes are easy to spot from across the room.
Print a silhouette, tape it to your wood, and tap nails along the edges. Peel the paper away, then start wrapping your string.
Stick with one color for a bold look, or blend a couple for extra detail. These are great for wall art and you can resize them however you want.
4) Alphabet letter string art

Making letter designs is super straightforward. Print a letter template, pop it on a board, and hammer nails along the outline. Wrap thread around the nails, tracing out the letter.
Works well for initials, names, or even short words. You can keep it simple with one color, or swap threads for something a little more playful.
Tons of free printable patterns are floating around online, so setup doesn’t take long. They help keep your spacing in check, too.
5) Mandala pattern string art

For mandala string art, start with a circular template and mark evenly spaced points around it. Tap in small nails or just use a sturdy board if you’re skipping the nails.
Wrap thread or embroidery floss around the points, repeating the motions to build up the pattern. Switching colors every so often gives that classic geometric look.
This one works as wall art or even a table accent, honestly. Try a small version if you’re just testing things out, or go big if you’re feeling ambitious.
6) Seasonal holiday string decorations

Want your holiday decorations to feel a bit more personal? String’s an easy way to do that. Just wrapping string lights around windows or railings instantly adds a cozy vibe.
Or try string art with shapes like snowflakes, stars, or Christmas trees, as these look great on walls or shelves as handmade accents.
You can also weave string lights through a wreath or garland. It’s a simple way to make your decorations glow when it’s dark out.
7) 3D cube string art
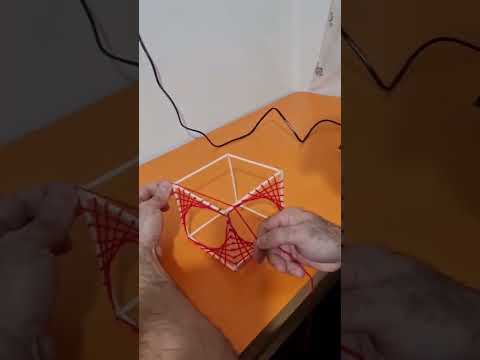
For a 3D cube effect, place nails in the shape of a cube’s edges and wrap string along them. Outline the cube first, then connect opposite corners with straight lines.
Bright thread works really well here, as the overlapping lines add depth. A dark board or painted background makes the shape pop.
No special skills needed. Start with a basic cube, then add extra layers if you want it to look more complex.
8) Mountain landscape string art

A simple mountain scene comes together with just nails, a wooden board, and string. Sketch a mountain outline, hammer nails along the lines, and wrap string to fill in the peaks and sky.
Neutral or earthy tones look great, but you could go for blues and greens too. Mixing a few shades adds depth without making things complicated.
You can buy a kit if you want everything ready to go, but honestly, gathering your own materials is half the fun. The finished piece has a nice nature vibe and looks sharp on a wall.
9) Floral bouquet string art
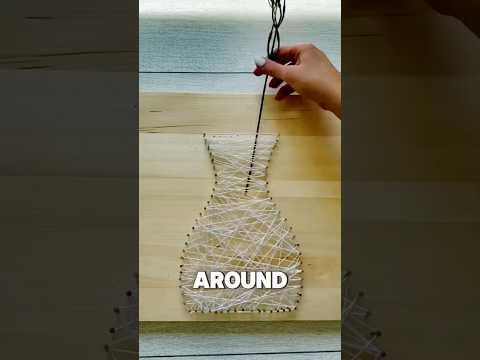
For a floral bouquet, arrange nails in the shape of flowers and stems, then use colorful thread for petals and leaves. It’s a bit more layered than a single flower and feels lively.
Mix up thread colors to get that real bouquet look. Lighter shades for petals, darker for stems as it just feels more balanced that way.
Mount your finished piece on a board so it’s sturdy and easy to hang. Plus, it gives everything a tidy, finished feel.
10) Halloween String Art Cards

Halloween Pumpkin String Art Cards are a fun twist on classic string art – perfect for spooky season crafting! Start with a sturdy card or small board as your base, sketch a simple pumpkin outline, and place small pins or nails along the edges of the design.
Wrap orange, black, or gold thread around the pins to form the pumpkin shape, crisscrossing the strings to create texture and depth. Add green thread for the stem or a few darker accents for a shadowy effect.
Each card turns out a little different, giving it a handmade charm. Use them as festive décor, unique Halloween greetings, or creative gift tags that show off your crafty side.
11) Rainbow color gradient string art
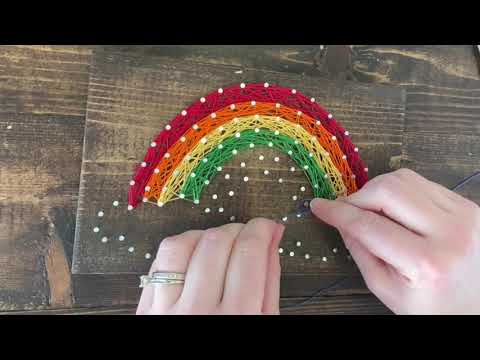
For a rainbow gradient, start with a simple outline on your board or canvas. Hammer nails evenly along the shape; spacing matters here.
Pick threads in rainbow order and wrap them in layers, moving gradually from one color to the next so everything blends. Keep the string tension pretty steady so the lines stay neat.
The end result is a colorful gradient that works as wall art or even a little desk piece.
12) Dreamcatcher with string weaving

To make a dreamcatcher, grab a simple hoop – metal or wood both work. Wrap it with yarn, suede, or fabric strips for a nice base.
Weave string across the center in a web pattern, pulling it tight so it holds. Add beads as you go for extra detail.
Tie on feathers, tassels, or more beads at the bottom. That last step really makes it your own.
13) Simple star string art
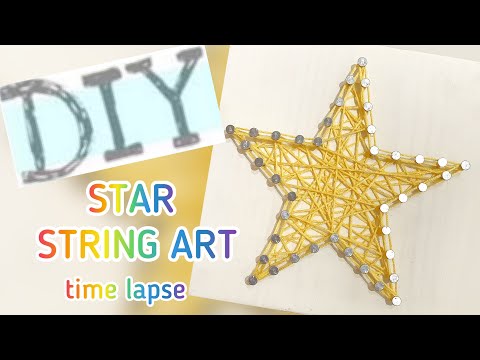
A star string art piece is quick and easy. Just mark a star, hammer nails at each point, and start wrapping your thread.
Keep the string snug as you go. The shape comes together pretty fast. No fancy tools needed, just some patience.
Try different colors for contrast, or stick with one for a classic look. Mixing two or three shades gives the star a bit more depth, if you’re into that.
14) Butterfly string art design
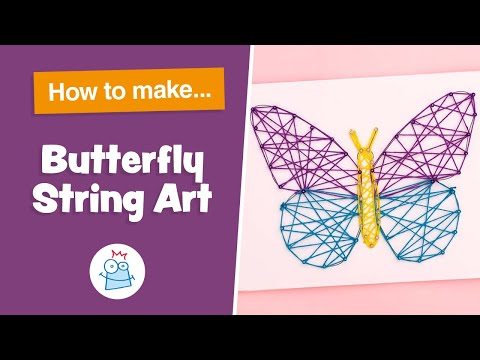
If you’re up for something colorful, a butterfly string art piece is a fun way to go. Just start with a basic outline – use a printed template or freehand it, whatever feels right – on a piece of wood or sturdy cardboard. Place nails or pins around the edges to map out the wings and body.
Then, grab your thread or cord and start wrapping it around the nails, filling in the wings with a mix of colors. The tighter and more even the lines, the neater it’ll look, but honestly, a little imperfection just adds character.
Go bold with your color choices if you want something eye-catching, or stick to muted tones for a softer vibe. It ends up looking really nice as wall decor, or hey, even as a handmade present for someone.
15) Gradient Feather String Art

Gradient Feather String Art brings a soft, flowing look to your wall décor. Start with a solid wooden board and sketch a feather outline in pencil. Hammer small nails along the edges, keeping the spacing even to define the shape.
Choose a range of thread colors that blend beautifully, from light to dark or warm to cool tones. Begin wrapping the string from one end of the feather to the other, gradually shifting colors to create a smooth gradient effect.
The finished piece has a delicate, airy feel that works well in any space. Try experimenting with different color palettes or feather sizes to match your style—each one turns out uniquely your own.
16) Minimalist circle string art
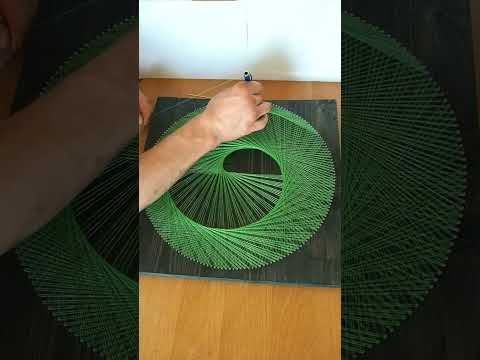
Sometimes less really is more, and that’s definitely true for this minimalist circle string art. You just set nails in a circle on a wooden board and start wrapping thread around them. No extra patterns, just a clean, modern look.
Mark out even points around the edge, hammer in your nails, and tie your string to one of them. Then, just crisscross the thread across the circle in repeating lines. It’s oddly satisfying.
You can keep things mellow with one neutral color, or get a little wild and use two contrasting shades for something that stands out more.
17) City skyline string art
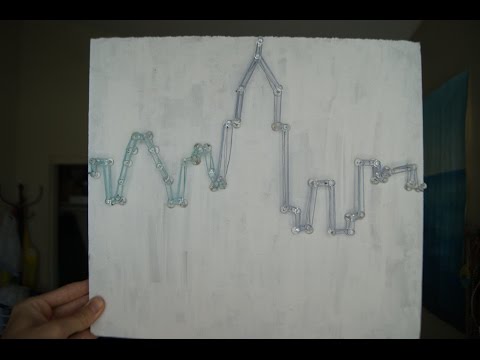
Bring a bit of the city into your space with a skyline string art piece. Sketch or trace your favorite skyline onto a wooden board, then hammer in nails along the outline, try to keep them spaced out as evenly as you can.
Once the nails are set, wrap string around them to shape the buildings. You could stick with one color for the outline, or mix in a few shades to highlight different parts of the skyline.
It’s a cool way to add an urban touch to your wall, and you can easily switch up the design for any city you like.
18) Tree silhouette string art

Want something a little more nature-inspired? Try making a tree silhouette with string art. Outline the tree shape (branches and trunk included) with nails on a wooden board. After that, weave string around the edges to make the silhouette pop.
Dark string for the tree and lighter string for the background usually works best, since the contrast really makes the shape stand out.
If you’re just starting out, a simple winter tree is a good choice. The lines are easy to follow and it still looks pretty striking when it’s done.
19) Custom name string art

Personalized name signs are always a hit, and making one with string art is surprisingly straightforward. Start by sketching or printing out the letters you want, then outline them with nails on a wooden board.
Wrap string around the nails to fill in each letter, or just trace the outline, either way works. Playing with different colors can really make the name pop, and mixing a couple of shades adds a nice touch.
These look great in bedrooms, nurseries, or as a thoughtful gift. You get to decide how bold or subtle you want to go with the style.
20) Music note string art

Want to sneak a bit of music into your decor? Try some string art in the shape of music notes or symbols. Grab a wooden board, print out a template, and gather some nails and colorful string or embroidery floss- nothing too fancy needed. Just hammer the nails around the outline, then zig-zag the string between them until your note takes shape.
Honestly, this one’s great if you’re new to string art. The shapes are pretty straightforward, so it’s tough to mess up. You could stick with a single note for that minimalist vibe, or maybe make a little set if you’re feeling ambitious.
Pick out thread colors that go with your space, or just use classic black for a crisp, simple look. When you’re done, you’ve got yourself a cool wall piece, or maybe even a handmade gift for a music-loving friend.