
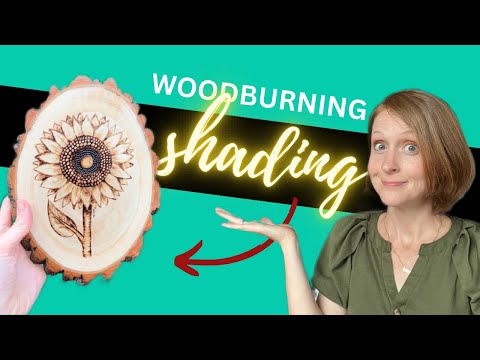
Wood burning can turn a plain scrap of wood into something you’ll want to keep forever, and flowers, well, they just make the whole process more fun. You can go for soft petals, bold lines, or those layered textures that really make a design pop. Here are twenty pyrography flower projects that balance being simple enough to try, but interesting enough to keep you hooked.
Each idea here focuses on a different flower or pattern, so you’re not stuck doing the same thing over and over. Whether you’re into detailed roses or just want to try a single minimal bloom, you’ll find something that matches your tools and skill level. It’s a good way to build your confidence without getting bored halfway through.
1) Rose Pyrography Design

Starting with a rose design? You really can’t mess that up. It’s a classic, and it gives you a chance to practice shading, layering petals, and keeping your lines clean. The shape is so familiar that you can focus on getting comfortable with your burner.
Sketch out the outline first, nothing fancy, just enough to guide you. That way, your petals don’t end up wonky. If you shade from the edges toward the center, it’ll look softer and more natural.
Mix it up with different rose styles: open blooms, tight buds, or even just a stylized outline. Every version teaches you a little more about working with tone and texture.
2) Sunflower Wood Burning Pattern
Sunflowers are always a crowd-pleaser. There’s something about that big round center and all those repeating petals that just works. It’s easy to plan out, too.
Outline the petals first using a fine tip, then add some shading near the center for a gentle gradient. You don’t need heavy contrast; just enough to make it feel real.
Basswood or birch are nice choices for this as they burn smoothly. And if you seal it lightly when you’re done, the tones stay crisp.
3) Daisy Floral Pyrography
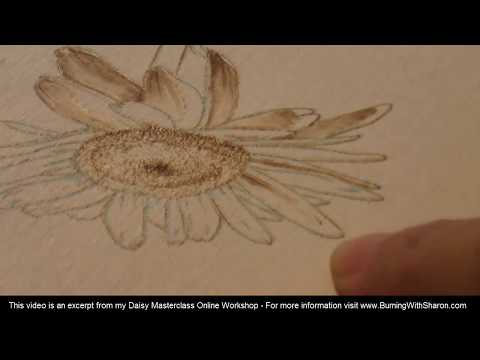
Daisies are a good place to start if you want something straightforward. The shape is simple, so it’s easy to burn without fuss. Just sketch the petals and center lightly, then use short strokes to shade the edges.
Layering light burns instead of digging in with a single dark line keeps the petals looking soft. It’s a subtle effect, but it really helps.
You can always add a bit of color; pencils or watercolor washes work after burning. A pale yellow or gentle brown in the center brings it all together without covering up your lines.
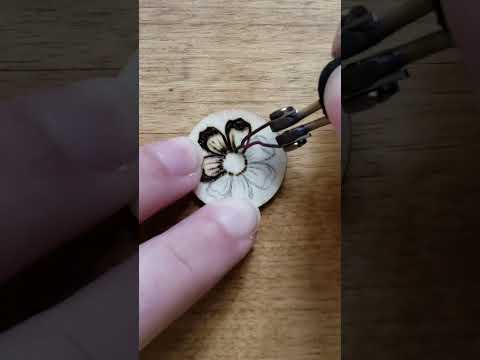
4) Cherry Blossom Pyrography
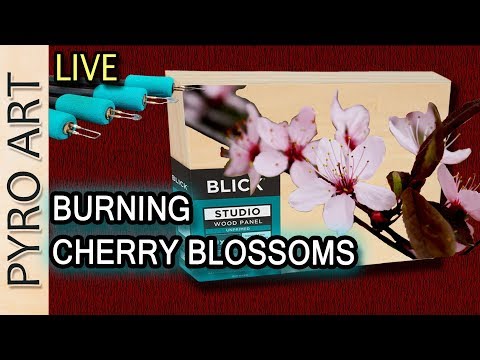
Cherry blossoms just have this peaceful vibe. Start by sketching out the branch, then trace the petals lightly. Softer lines are your friend here, as they help capture that delicate look.
A fine-tip pen works well for the petal edges. If you bump up the heat a little for the centers, you’ll get a nice contrast without going overboard.
You might want to shade around the flowers for a bit of depth, but don’t overdo it. The goal is to keep things light and airy, like the real deal.
5) Orchid Flower Burning Design
Orchids are all about those smooth curves. Trace your outline first, no shame in using a template if you want. Steady hands help, but don’t stress about perfection.
Go for a fine tip on the outlines, then shade the inner petals with a softer touch. Light shading at the edges can make the orchid stand out a bit more.
Different woods give different looks – lighter woods keep things soft and balanced, which suits orchids pretty well.
6) Tulip Wood Burning Pattern

Tulips are instantly recognizable and pretty forgiving. Sketch out the outline, then use light strokes for the petals. A little extra darkness near the base makes the flower pop.
A fine tip keeps those curves neat. If you want, add a leaf or two for balance, it doesn’t take much to make the whole thing feel finished.
7) Hibiscus Pyrography Art
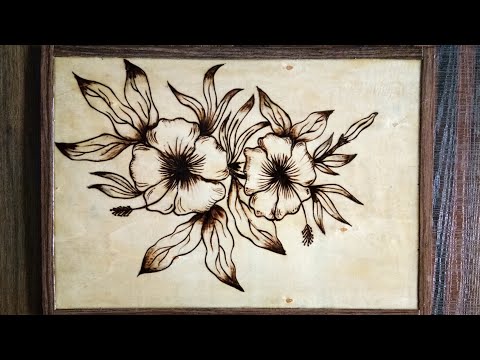
Hibiscus flowers bring a little bit of the tropics to your workbench. The petals are wide and bold, so they’re easy to outline and shade. Sketch first to plan how the petals overlap.
Medium heat is your friend here. Too hot and you’ll lose detail; too cool and it takes forever. Soft shading near the center gives the flower depth without making things muddy.
If you’re up for it, colored pencils or watercolors after burning can really make the petals stand out. The mix of burned lines and color keeps it lively.
8) Peony Flower Pyrography
Peonies are great if you want to practice shading and playing with texture. Those layered petals give you a chance to try out different heat settings and tip shapes. Start with the main bloom, then add a bud or some leaves for variety.
Add a few light touches (maybe dots or faint lines) to hint at moisture, almost like “Peonies in the Rain.” Just enough to suggest droplets, not enough to distract. Let the wood grain show through; it adds a little extra something to the finished piece.
9) Vine and Small Flowers Border
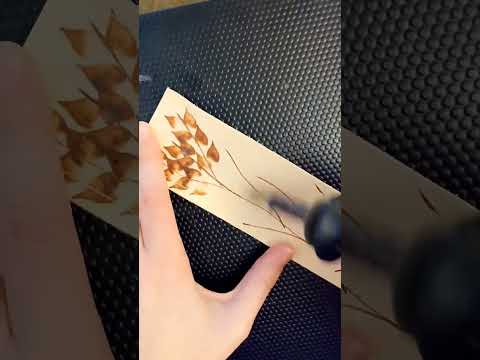
A thin vine winding around tiny flowers makes a great border for plaques, boxes, or frames. It adds a natural edge without being too much.
Start with a few curved lines, then dot in little blooms – daisies or forget-me-nots work nicely. Try to keep the spacing even, but don’t sweat it if it’s a little off.
Use a fine tip for the vines so the lines stay crisp. A bit of shading around the petals helps the flowers stand out without making things feel crowded.
10) Wildflower Cluster Design
A wildflower cluster just feels relaxed and natural. Grouping a few small blooms together gives you a nice mix of shapes and textures, nothing too symmetrical.
Sketch a couple of native flowers (daisies, asters, coneflowers, whatever you like) before you start burning. Let the petals be a little uneven; that’s what makes it feel alive.
Light shading around the stems adds some depth. Use a fine tip for outlines and a medium tip for darker spots if you want more contrast.
11) Minimalist Single Flower
Stick to just one bloom for this project, maybe a daisy, tulip, or poppy. There’s something about a single flower that just feels right: clean, balanced, and not too busy. Burn steady lines and add a bit of light shading to really show off the shape without overdoing it.
Use a fine tip for the outline, then switch to a medium tip for some soft texture in the petals. Light pressure is your friend here; it keeps the lines crisp and helps you control the tone. This style’s perfect for coasters, bookmarks, or any little plaque where you’re working with limited space.
12) Calligraphy with Floral Accents

Calligraphy and floral pyrography go together surprisingly well. Try burning simple flower outlines around your lettering or weaving a few petals through the curves of each letter. The result? Clean lines with a soft, natural vibe.
It helps to sketch your layout first so the spacing between letters and flowers doesn’t get weird. Maybe even trace a few practice lines on scrap wood before you commit. Little details like leaves or buds can frame each word without making things feel crowded.
A couple of shaded petals or some textured stems can give the lettering a bit more depth. Keep your heat setting low for the fine lines and crank it up a bit for darker outlines. This combo’s great for name signs, quotes, or decorative plaques.
13) Woodburned Poppies Sign
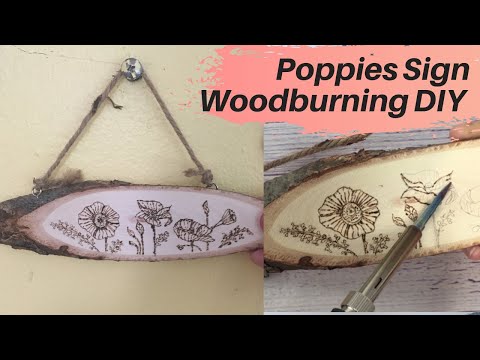
Create a charming rustic décor piece with this Woodburned Poppies Sign! Burn a delicate field of poppies onto a natural tree slice, highlighting the wood’s grain for an organic look.
Finish by attaching twine to the top for easy hanging – a simple, nature-inspired project that adds warmth and handcrafted beauty to any space.
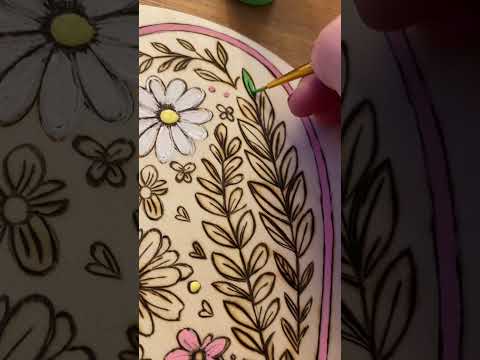
14) Leaf and Flower Combination

Bringing leaves into your floral pyrography adds a nice bit of balance and texture. Pair up broad leaves with smaller blossoms, or maybe fine vines with bigger petals. This approach keeps things looking natural and not too stiff.
It’s usually a good idea to sketch a few leaf shapes around your main flower before burning. Adjust the spacing so the leaves frame the bloom without making it feel cramped. A little light shading along the leaf veins can add just enough detail.
For more depth, try burning some overlapping layers where leaves peek out from behind petals. It’s a simple trick, but it really helps your design stand out.
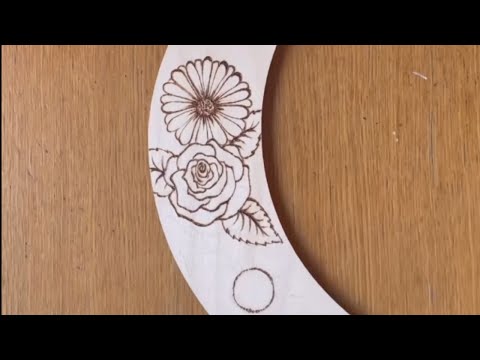
15) Vintage Rose Wood Burning

A vintage rose design can give your wood piece a timeless look. The soft curves of rose petals seem to go perfectly with the wood grain, and the effect is just classic.
Start with a basic outline or use a printed pattern if you’re not feeling super confident. Grab a fine-tipped pyrography pen to trace the petals, then add some shading for depth.
Go light at first and build up the darker tones slowly as harsh lines are tough to fix. A gentle finish with clear wax or oil keeps that aged look and brings out those subtle burn marks.
16) Abstract Floral Shapes
Abstract floral shapes are all about the flow. Instead of obsessing over perfect petals, focus on how the lines and textures move across the wood. It’s a good way to get a more modern, expressive feel.
Try using curved strokes to hint at petals or leaves without actually drawing them out. The burned lines can suggest movement and depth, but the design stays simple.
Play around with spacing and shading until you get a balance that feels right. Sometimes less detail just looks better, it gives the whole piece a stronger vibe.
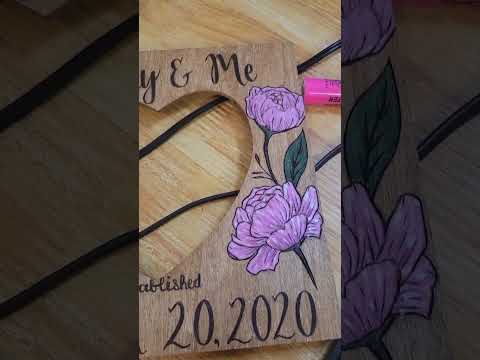
17) Floral Heart Frame Design
For a sweet touch, sketch a simple heart outline and surround it with little flowers or leaves to make a floral heart frame. This looks great on plaques, coasters, or even small wood slices.
Mix up the flower shapes for a border that isn’t boring. Roses, daisies, wildflowers, they all burn nicely and add a bit of texture.
Start with light burn lines, then darken the edges to add some depth. The heart shape stands out as a focal point, while the flowers soften the whole look and add a bit of personality.
18) Woodburned Pine Tree
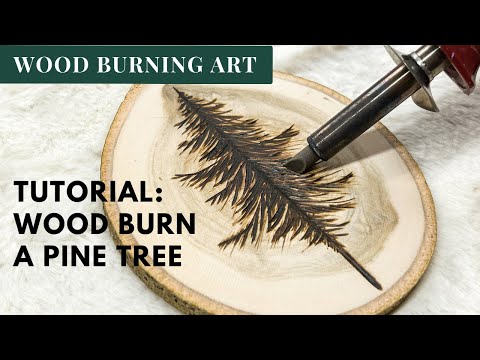
Although not a flower (sorry!), pine trees are perfect for beginners and can really help you improve early technique and skills. This simple project captures the beauty of nature with minimal tools and technique. Burn a few pine tree silhouettes onto a wood slice or plaque, experimenting with line depth for texture and shading.
It’s an easy, relaxing project that creates a peaceful, rustic piece of art; ideal for gifts or cozy home décor.