Knapping is one of those ancient crafts that just pulls you in; shaping raw stone into something useful or beautiful, right in your hands. There’s something grounding about feeling each strike and realizing that ancient skills still matter, even now. With a bit of patience and focus, you’ll see how basic materials like flint, obsidian, or chert can turn into surprisingly sharp tools or artful pieces.
Here’s a bunch of project ideas to help you get started, or to push your skills further if you’re already hooked. Some use recycled stuff, some stick to what you can find outdoors, and most are totally doable at home. You’ll get to try out new techniques and materials, and hopefully have a good time along the way.

- Complete 9-Piece Kit--Flint knapping kit include 3 copper boppers (large, medium, small), 1 pressure...
- Material--Professional Pure Copper Boppers (not common brass!) with Beechwood Handles. Our boppers...
- Technique--Start with a large bopper for rough shaping. Refine with medium and small tools. Use a...
1) Beginner’s Flint Knapping Kit Project

Starting out with knapping? A beginner’s kit makes life easier, usually just a copper billet, Ishi stick, a leather pad, and a couple of abraders. That’s honestly all you need to get going.
Grab a few small pieces of flint or obsidian and start practicing. Don’t expect masterpieces right away, just focus on how the stone breaks and try not to rush it.
Definitely wear gloves and eye protection. It’s not the fastest process, but with a basic kit, you can really get the hang of things without spending much at all.
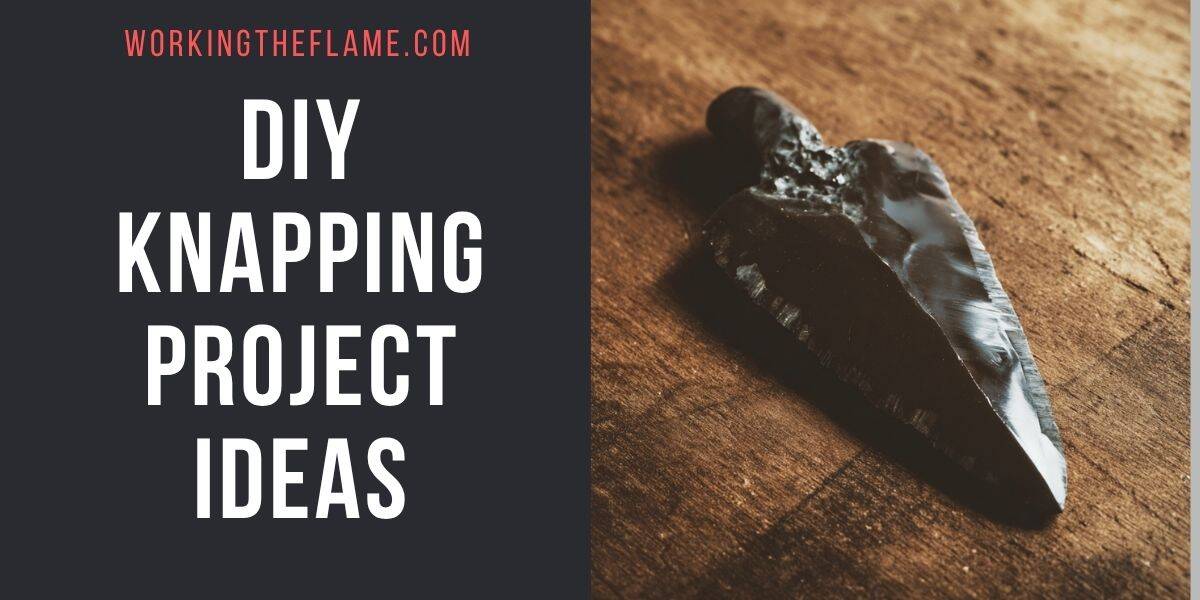
2) Making Obsidian Arrowheads

Obsidian is just awesome for arrowheads, flint knapping it feels like working with glass (because, well, it sort of is). You’ll knock off flakes until you’ve got a thin, pointed shape with edges that are sharper than most knives.
Pick out a good chunk of obsidian and grab a hammerstone and pressure flaker. Go slow, and take off tiny flakes so you don’t ruin the shape. Safety glasses and gloves are a must, the shards are no joke.
Once you’ve got the size and shape you want, clean up those edges. If you stick with it, your arrowheads will start looking less like broken glass and more like something you’d actually want to show off.
3) DIY Copper Bopper Tool

A copper bopper is one of those tools that just makes knapping easier. You can make one from a copper plumbing cap and a short wooden handle, no need for anything fancy. A 1-inch or 1.5-inch cap usually does the trick.
Sand the handle smooth and maybe seal it with varnish so it lasts. Attach the cap tight with epoxy or just a good friction fit. The copper gives your strikes a nice, solid feel.
If it ever loosens up, you can fix it pretty easily. This is one of those tools you’ll probably end up using for years.
4) Step-by-Step Primitive Arrowhead

Pick a decent stone like flint, chert, or obsidian, these break in ways that make shaping edges a lot less frustrating. Knock off flakes with a hammerstone or copper bopper until you see a point taking shape.
Then, grab an antler tine or copper tool for pressure flaking. Chip away at the edges, thinning and refining as you go. Keep flipping it over so both sides stay balanced.
Shape the base so it’ll fit onto a shaft, and smooth out any rough spots where it’ll be tied on. That’s it—you’ve got yourself a primitive arrowhead.
5) Knapping with Ohio Flint

Ohio flint is kind of special, you can still find it in old quarries where people used to gather stone ages ago. It breaks nice and clean, and the colors and patterns are just cool. A lot of knappers like the variety; no two pieces are quite the same.
Start with some small flakes to get a feel for how hard it is. Use steady, controlled strikes and prep your platforms well. It can be a bit brittle, so you’ll probably get better results with gentle pressure flaking instead of going at it too hard.
6) Crafting Antler Pressure Flakers
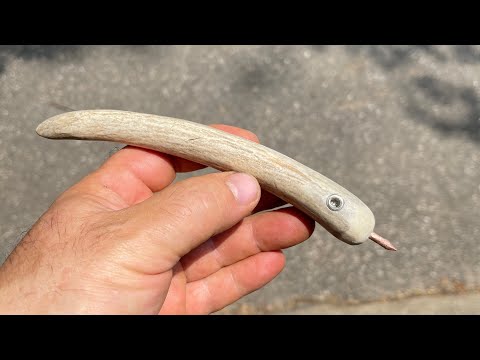
You can whip up a solid pressure flaker from a deer antler tine and a bit of copper wire or even a nail. Drill a hole in the end of the tine, pop in the copper, and tighten it with a set screw if you want to get fancy.
Smooth out the handle so it doesn’t dig into your hand, sanding and rounding the edges helps a lot.
Keep it clean, and swap out the copper tip when it gets worn down. With a little patience, you’ve got a reliable tool for the detail work.
7) Recreating Ancient Spear Points

Making spear points like ancient hunters used is both challenging and kind of meditative. Flint, obsidian, or chert work best, they break in ways that let you get a sharp, usable point.
Pick a piece that feels good in your hand and has a flat spot to start from. Take off small flakes with a hammerstone or antler billet, keeping the edges even and thin but not so fragile that they’ll snap.
When you’re done, you’ve got a tool that’s part history lesson, part proof of your patience.
8) DIY Leather Pad for Knapping Safety

A leather pad is a must for protecting your hands or legs while you’re working. Just cut a piece of thick leather from an old jacket, shoe sole, or whatever you’ve got. Make it big enough to cover your palm or thigh, and double it up if you want extra padding.
A smooth surface helps the flakes slide off, and some folks add a bit of rubber underneath for more shock absorption. This little addition can save you from a lot of cuts and scrapes.
9) Crafting Agate Projectile Points

Shaping agate into projectile points is a bit of a challenge, but honestly, it’s pretty satisfying once you get the hang of it. You’ll use the same knapping techniques as you would for flint or obsidian, though agate’s notorious hardness means you’ll need a little extra patience. The payoff? Razor-sharp edges and a glossy finish that just looks cool.
Pick out a chunk of agate that’s as free from cracks as you can find. Grab a hammerstone or a copper bopper and start knocking off flakes- slowly. If you rush, you’ll probably end up with a pile of shards.
Once you’ve got the rough shape, use pressure flaking to refine the edges and get things symmetrical. A final round of polishing will bring out those wild agate colors, so your point isn’t just functional, it’s also kind of a showpiece.
10) Making a Flint Knapping Hammer

You can whip up a flint knapping hammer from basic materials like brass, copper, or steel. A short handle paired with a solid head gives you more control – especially for the finer stuff. Lots of folks use a small brass head, maybe an inch long, for sharpening or shaping gunflints.
Attach the head to a sturdy wooden handle, epoxy works, or just wedge it in tight. The important thing is that it feels balanced in your hand. Play around with different metals if you’re curious; sometimes a little experimenting is the only way to figure out what works best for you.