Glitter just has this way of making even the most basic thing feel a little more magical, doesn’t it? Whether you’re sprucing up your space, giving accessories a quick makeover, or making a gift for someone, a dash of sparkle can really transform stuff. You’ll see how easy it is to turn everyday items into eye-catching pieces with just a bit of glitter.
No need to be a pro crafter or spend a ton at the craft store to pull these off. From tiny accents to bigger, bolder projects, each one lets you play around and add your own spin. There are so many ways to use glitter, and it’s honestly kind of hard to stop once you get started.
1) Glitter Mason Jars

Plain mason jars? Kind of boring. But with a little glitter and glue, you can make them shine. This one’s super beginner-friendly with no fancy steps or hard-to-find supplies.
Just brush a thin layer of glue on the inside or outside (your call), then sprinkle on the glitter. Try to get it even, but honestly, a little messiness can look cool too.
Once it’s dry, use your new sparkly jar as a candle holder, vase, or even a spot to stash pens. They’re also pretty great as last-minute gifts or party decor.
2) DIY Glitter Slime

Making glitter slime is surprisingly simple! Just clear glue, glitter, and something like contact solution or liquid starch to bring it all together.
Mix the glue and glitter first so the sparkle spreads out nicely. Add your activator a bit at a time while stirring. When it starts pulling away from the bowl, you’re on the right track.
Knead it with your hands until it gets stretchy and smooth. Want more color? Use glitter glue or just dump in extra glitter!
3) Glitter Painted Rocks

Rocks are everywhere, right? Wash and dry a few, slap on some acrylic paint as a base, and you’re set.
Once the paint dries, brush on glue wherever you want glitter, then sprinkle away. Shake off the extra and let it dry.
Seal it with a clear coat or a glue-water mix so the glitter doesn’t end up everywhere. These look cute as garden accents or paperweights, or just as little gifts.
4) Glitter Crayons

Glitter crayons are a fun way to use up broken bits. Melt old crayons, stir in some fine glitter, and pour into silicone molds – stars, hearts, whatever shape you like.
You can use the oven or microwave, whichever you trust more. The glitter mixes right into the wax, so when you color, you get that sparkly effect.
5) Glittered Shoes

Got a pair of heels you’re bored with? Cover them in glitter for a fresh look. Pick shoes you’re okay experimenting on, since there’s no going back.
Tape off spots like the soles or laces if you want to keep them clean. Brush on glue, sprinkle glitter, and let them dry.
Give them a coat of clear sealant spray so you’re not leaving a trail of glitter everywhere you walk.
6) Glitter Gift Wrap

Plain wrapping paper can look so much better with a bit of glitter. Draw patterns with glue, sprinkle glitter, shake off the extra, and let it dry.
Or use double-sided tape to make lines or shapes, then press glitter onto it for a neat, mess-free finish.
If you’re more into bags than paper, decorate kraft gift bags with glittery touches. Makes even simple packaging feel a little more special.
7) Glitter Mousepads

A glitter mousepad is a quick fix for a boring desk. Just take a plain mousepad, brush on glue, sprinkle glitter, and let it dry.
Seal it with Mod Podge or something similar so the glitter doesn’t get everywhere. You can go monochrome or mix colors if you’re feeling bold.
Makes a nice little gift, too, if you want to surprise someone at work or school.
8) Glitter Tabletop

If your tabletop’s looking tired, glitter can help. Brush on glue or Mod Podge, sprinkle glitter, and let it dry.
Brush off the loose stuff, then seal the top with clear resin or a few layers of varnish. This keeps the surface smooth and the glitter locked in.
Try one color for a sleek look or mix a few for something more playful. Works great for small tables or trays.
9) Glitter Phone Case

A plain phone case is just begging for some glitter. Clear cases work best since they really show off the sparkle.
Brush Mod Podge or clear glue on the inside, sprinkle glitter, and let it dry. Want a smoother finish? Add another coat of Mod Podge or even a thin layer of epoxy resin.
Keeps the glitter from flaking off every time you grab your phone.
10) Glitter Ornaments

Clear ornaments are basically a blank canvas. Swirl glue inside a glass or plastic ornament, pour in glitter, and spin it around until it’s covered.
You can play with ombre or marbled effects by mixing shades. Fine and chunky glitter together? Looks awesome when the light hits.
If you want, grab a glue pen and add initials or little doodles for a more personal touch.
11) Glitter Canvas Art

A blank canvas plus glitter and glue? Easy win. Sketch out a simple shape (maybe a heart, star, or letter) fill it with glue, then cover it in glitter.
Layering a few colors can give you that ombre look. Start dark and work your way lighter for a nice gradient.
If you’re not into freehand, use a stencil for sharp edges. Just peel it off once the glue dries and you’re done.
12) Glittered Flower Pots

Terracotta pots are kind of plain, but a little glitter can fix that. Mix decoupage glue with glitter and brush it on.
Mark where you want the glitter to stop, then add thin layers, letting each dry before the next. That way, the finish looks even.
Try different colors for a whole set or stick to gold and silver for a classic vibe. These pots look cute with succulents or herbs, or just as little catch-alls.
13) Glitter Party Decorations

Party decorations can always use more sparkle. Brush glue onto jars and roll them in glitter; they make great centerpieces or candle holders.
Balloons? Spray adhesive, a dusting of glitter, and you’ve got instant party flair. Hang them up or scatter them around.
Or try glitter-dipped cups and utensils: just coat the ends with glue, sprinkle glitter, and let them dry for a festive touch.
14) Glitter Resin Jewelry

If you’ve ever wanted to make your own pendants, rings, or earrings, mixing glitter into resin is a pretty fun way to start. Usually, you’ll combine resin and hardener, toss in some glitter (fine or chunky, whatever’s calling your name) and pour it all into a mold.
UV resin is awesome for smaller pieces since it cures fast under a UV lamp. No need to wait around forever for your jewelry to set.
It’s worth playing around with different glitter colors and sizes. Layer them or sneak in tiny decorations if you’re feeling creative. There’s no real wrong way to do it, honestly.
15) Glittered Picture Frames

Turning a boring frame into something with a bit of wow-factor is surprisingly easy with glitter and glue. Just grab a wood or plastic frame, paint on some clear craft glue, and sprinkle glitter right over it.
Once it’s dry, shake off the extra glitter. A quick coat of clear sealant keeps the sparkle from ending up everywhere (which, let’s be real, glitter loves to do).
Mixing different colors or adding a few gems can make things more interesting. These frames are fun for photos, holiday prints, or whatever little artwork you want to show off.
16) Glitter Spiderweb

A glittery peel-off spiderweb is a fun and spooky way to get your home ready for Halloween using just a few basic supplies. By tracing a web design onto a smooth card with plenty of glue and showering it in dark black glitter, you create a shimmering, eerie decoration that is surprisingly easy to make.
Once the glue is fully dry, you can carefully peel the web away from the backing to create a flexible, sparkling decal. These look fantastic when pressed onto windows or mirrors where the light can catch the glittery strands.
17) Glitter Coasters

Making glitter coasters is a breeze if you’ve got cork bases, resin, or even silicone molds lying around. The glitter gives them a bright finish that’s perfect for daily use or just when you want to dress things up a bit.
Try mixing up the glitter colors to match your space or whatever mood you’re in. Fine glitter looks sleek, but chunky glitter brings a bit more attitude.
They’re great for protecting your table from drink rings and double as simple DIY décor. Plus, they’re a solid homemade gift, even if you’re not a crafting pro.
18) Glittered Candles

Plain candles can get a glow-up with just a little glue and some loose glitter. Brush on a thin layer of craft glue, sprinkle glitter over it, and let it dry.
Go for one color if you want something simple, or mix a few shades for a more playful look. Cover just the base or the top if you’re after a subtle effect.
A quick spray of clear sealant helps keep the glitter from wandering all over your table. These are fun for holiday tables, parties, or just as a small, sparkly gift.
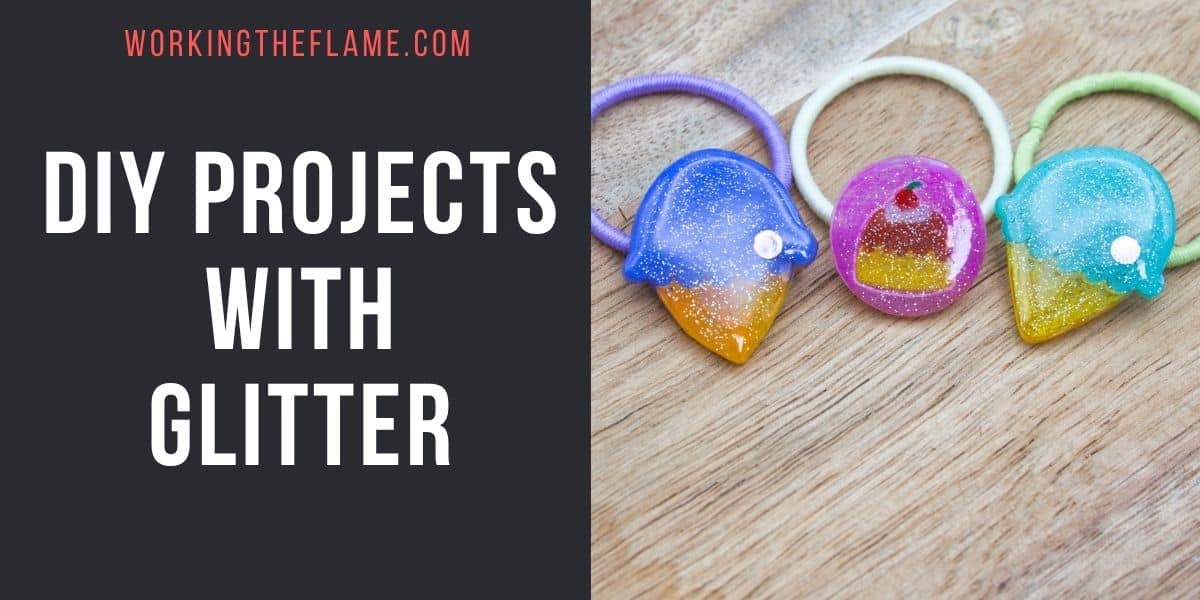
19) Glitter Hair Accessories

Making your own glitter hair clips is actually pretty simple. Foam sheets, cardboard, or fabric work, and you can stick them onto plain barrettes or snap clips with some strong glue. Instant sparkle for your hair!
If you’re not into clips, glitter hair gel is another route. Just mix cosmetic glitter with clear hair gel and swipe it on your roots, ends, or wherever you want a little shine.
And hey, if you want something you can use again and again, try covering headbands or combs with glittery fabric. It’s an easy way to brighten up your everyday hair routine.
20) Glittered Keychains

Making glittered keychains is honestly way easier than you’d think. All you really need are some acrylic blanks, a bit of resin (or Mod Podge if you’re not into mixing chemicals), and of course, your favorite glitter. Just sprinkle it on, seal it up, and you’ve got a surface that’s both shiny and tough enough for daily use.
They’re kind of perfect as little gifts or party favors, especially since you can slap on someone’s initials or pick out a fun shape. Grab a pack of blanks and a handful of key rings, and suddenly you’re making a whole batch without much fuss.
If you’re feeling bold, try chunky glitter for more sparkle, or stick with the fine stuff for a softer vibe. There’s really no wrong way to do it, and honestly, it’s pretty forgiving even if you’re new to crafting.