
Working with stones is one of those things that just feels satisfying. There’s something about turning a simple pebble or a smooth rock into something that actually adds character to your home or garden. You get both creativity and function when you use stones for DIY projects.
There are so many directions you can take: some projects are purely decorative, others are surprisingly useful. You’ll see painted designs, stacked arrangements, even a few quirky ideas that might surprise you. However you lean, these projects let you sneak a little bit of nature into your day-to-day life.
1) Pebble Art Clock with Coastal Design

You can turn smooth pebbles into a clock that’s both useful and nice to look at. A round wooden base works great – glue stones around the edge to mark the hours.
If you like that breezy, beachy vibe, try pebbles in gray, white, or sand colors. A couple of seashells or a bit of driftwood can add just enough detail without making it feel cluttered.
Pop on the clock hands and a battery mechanism in the center and you’re done. This kind of clock looks right at home in a living room, kitchen, or even the bathroom if you’re feeling bold.
2) DIY Word Stones with Inspirational Quotes
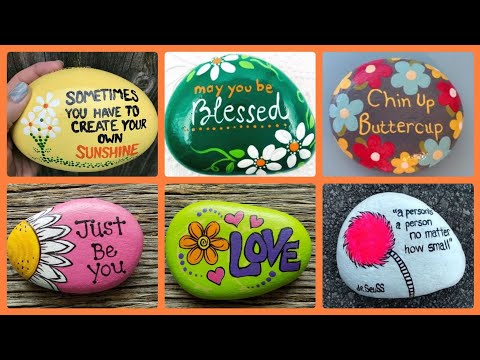
Plain stones can become little reminders with just a few words or quotes. Go for flat, smooth rocks, they’re just easier to write on.
Give them a quick wash and let them dry so your paint or marker actually sticks. Acrylic paint pens or permanent markers are super easy to use and show up really well.
A clear sealer spray or brush-on finish will keep your words from fading and help the stones stay looking good, whether they’re outside or getting handled a lot.
3) Heart-Shaped Rock Display
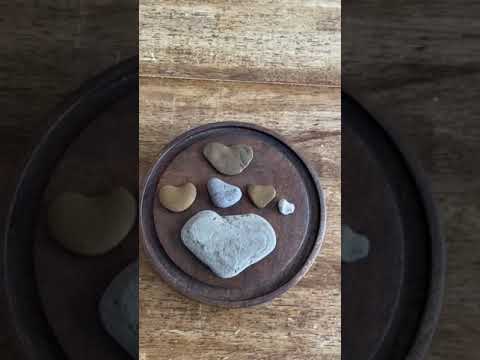
Collecting heart-shaped rocks is oddly addictive. They don’t have to be perfect – those little quirks are what make them interesting.
Pile them in a shallow tray, line them up on a shelf, or toss them in a glass jar. Grouping them together makes the heart shapes stand out more.
If you want to get fancy, mount them on a piece of driftwood or a board. Labels with where you found each one? That’s a nice personal touch, honestly.
4) Painted Rock Animals for Kids

Turning rocks into animal shapes is a classic, and kids seem to love it. Ladybugs, turtles, cats, you don’t need to be an artist to make something cute.
Smooth river rocks are ideal because they’re easier to paint. Acrylics dry fast and hold up well, especially if you’re working with impatient little hands. A coat of clear sealant helps the paint last, especially outside.
Let the kids pick their favorite animals and go wild. These painted creatures are fun in the garden, on a shelf, or as tiny gifts.
5) Rock Pocket Friends Craft

Small stones become little pocket pals with a bit of paint and some imagination. Each one ends up with its own personality.
Draw faces, patterns, or even tiny outfits – whatever feels right. Bright colors make them extra cheerful.
Keep them in a box or pouch so they don’t disappear into the couch cushions. These are the kind of handmade gifts that people actually want to keep.
6) DIY Tissue Box Cover with Small Rocks

Give a boring tissue box a natural upgrade by covering it with small stones. The rocks add a nice texture and a bit of heft, so it doesn’t slide around like cardboard.
Build a little frame out of sticks or thin wood, then fill in the spaces with pebbles while the glue’s still wet.
Stick with flatter stones, they’ll sit better and keep the cover from feeling too clunky.
7) Decorative Wrapped Stones in Zen Style

Wrapping stones with cord, yarn, or thin cane can create cool patterns. It’s simple but surprisingly striking.
Try different knots or crisscrossing lines for variety. Neutral colors give a calm, zen vibe, but sometimes a pop of color is just more fun.
Display a few together on a shelf or table, and suddenly you’ve got a little art installation that feels intentional but not overdone.
8) Cabinet Pulls Made from Smooth Rocks
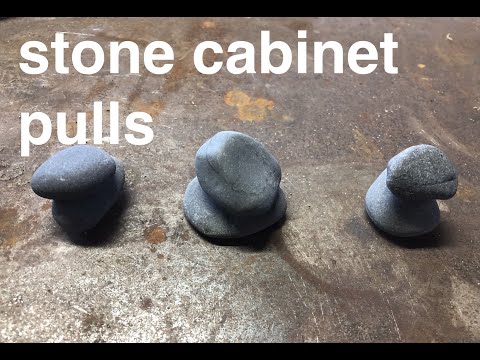
Smooth stones can be turned into cabinet pulls with just a bit of effort. Flat or rounded rocks are easiest to grab and attach.
Drill a hole in the back or use strong adhesive with connector caps and bolts. Then just screw them onto your drawers or doors.
Pick rocks that feel good in your hand and fit the cabinet size. The color and texture make each pull a little different, which is honestly part of the charm.
9) Colorful Stone Wall Art

Create a simple wall piece by arranging painted stones pretty shapes. Flat stones work best since they’ll actually stay put.
Paint each rock a different color first – acrylics dry fast, so you’re not stuck waiting around.
Glue them onto a solid backing like wood or canvas. Once it’s dry, hang it up and enjoy a burst of color that’s still grounded in nature.
10) Story Stones for Interactive Play
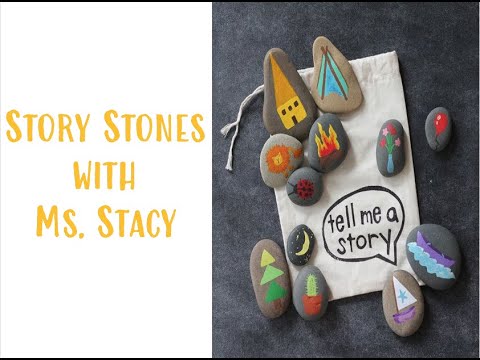
Story stones are a fun way to spark creativity. Grab some smooth rocks and paint little pictures, animals, objects, people, whatever comes to mind. Acrylic paint or permanent markers do the trick, and a coat of varnish helps them last.
Use the finished stones to tell stories, pick a few at random and weave them into a tale. It’s a great exercise for quick thinking, and you really don’t need any fancy supplies.
Kids love trading stones or adding new ones to the collection. The themes can be as broad or as weird as you want – nature, fairy tales, daily life, you name it.
11) Rock Garden Markers with Painted Labels

Turn smooth stones into garden markers with a bit of paint. Flat rocks are easiest to write on, just give them a good wash first.
Outdoor acrylic paint or permanent markers will hold up against the weather. A coat of white paint as a base makes the names pop.
Write short labels like “Basil” or “Tomato” to keep things organized. Adding a doodle or a splash of color makes them easier to spot.
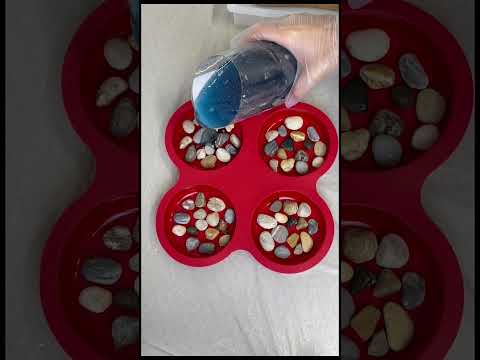
12) Pebble Mosaic Flower Pots
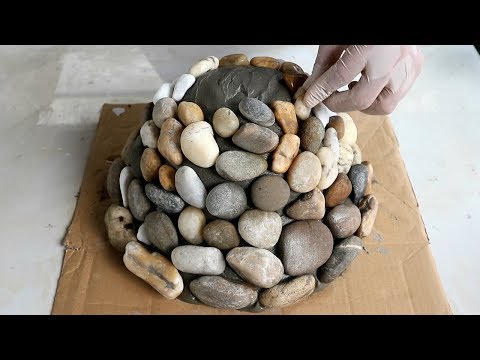
Plain flower pots can look so much better with a pebble mosaic. The stones give texture and a bit of weight, plus it just feels more natural.
Slather on a strong outdoor adhesive, then stick the pebbles on one by one, working in rows for a tidy look.
Mix up the colors or sizes if you want more variety. Toss in a few broken tiles or glass pieces if you’re feeling adventurous.
13) Painted Mandala Stones

Painting mandala patterns on stones is pretty relaxing, and the results are always unique. Start with a smooth, clean rock and use acrylic paints with dotting tools (or just the end of a brush, no need to overthink it).
Begin with a dot in the middle and work your way out, keeping the circles or shapes even. Symmetry is nice, but don’t stress if it’s not perfect.
Try out different color combos and see what you like best. These make cool decorations, paperweights, or even thoughtful little gifts.
14) Stacked Rock Cairns for Home Decor

You can make stacked rock cairns with stones in all sorts of shapes and sizes, just layering them until they balance. Flat ones at the bottom help keep things steady, and then you can play around with smaller or rounder rocks on top for a bit of height or color.
Stick a cairn on a shelf, a windowsill, or even tucked into a garden corner – honestly, they fit just about anywhere and bring a little outdoorsy vibe inside. The mix of textures and tones keeps each stack feeling one-of-a-kind.
If you’re not into giant towers, try making a few little cairns instead. Cluster them together for a laid-back display you can move around or rearrange whenever the mood strikes.
15) Rock Photo Holders with Wire

With a smooth stone and some wire, you can whip up simple photo holders in no time. The rock anchors everything, and the wire does the work of holding your photo.
Just wrap floral or copper wire snugly around the stone so it’s nice and secure. Leave a bit sticking up, then twist it into a little spiral or loop, whatever shape you like.
Pop a photo or even a note into the loop, and that’s it. You’ve got a sturdy, handmade stand. They’re great as gifts, and you can paint the rocks or leave them natural, depending on your style (or your patience).
16) Natural Stone Candle Holders
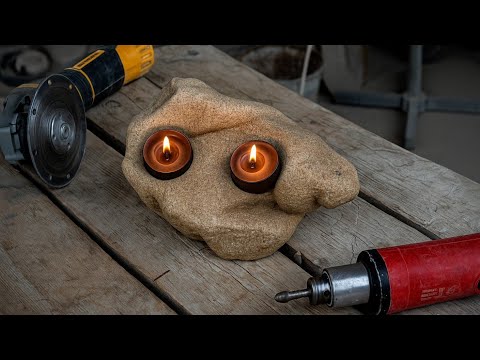
If you’ve got a smooth, chunky stone, it’s pretty easy to make a candle holder: just drill a shallow hole big enough for a tea light or votive. That’s basically it – simple but surprisingly nice.
Or, skip the drill and stack flat stones around a glass candle cup for a layered look that feels a bit rustic. The stones keep the cup steady while adding some texture.
Not in the mood for tools? Just fill a shallow bowl with pebbles and nestle a few candles in there. It’s low effort, but it still looks cozy and grounded.
17) DIY Rock Jewelry with Polished Stones

It’s actually pretty fun to turn polished stones into necklaces, rings, or bracelets, and you really don’t need much, just a few tools. If your stone’s got a hole, thread it onto a cord. Otherwise, wrap it up with some wire.
Pendants are the easiest starting point, since you just need a stone, a bit of wire, and a chain. Smaller stones can become earrings, while chunkier ones make bold necklaces or even statement rings.
Mix up the wire – copper, silver, whatever feels right with your stones. That way, your jewelry ends up feeling personal and easy to wear, even if you’re just throwing it on with jeans and a t-shirt.
18) Personalized Pet Memorial Stones
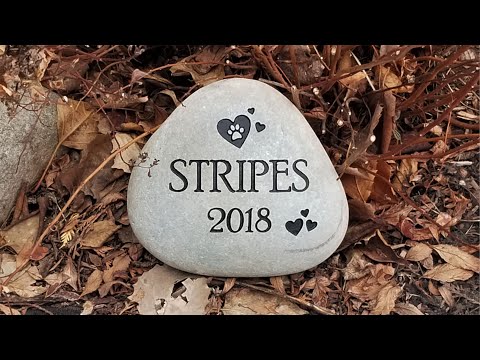
For a simple pet memorial, pick out a flat rock and paint your pet’s name or a little message. Acrylic paint or paint pens both work, just go with what you have.
If you’re feeling a bit more ambitious, try engraving with a rotary tool to carve a name, date, or a small design into the stone.
Adding paw prints, handprints, or tiny decorations like glass beads makes it even more personal. Set the stone in your garden or yard to mark a spot that means something to you.
19) Rock Coasters with Sealed Paint
Flat stones can easily become coasters, just add a little paint and seal them up. Give the stones a good wash and let them dry before you start.
Paint stripes, dots, or whatever patterns you feel like. Acrylic paint is reliable since it sticks to stone and dries fast.
When you’re happy with the look, brush or spray on a waterproof sealant. That’ll keep your design safe from chipping and protect the coaster from any drink rings or spills.
20) Outdoor Rock Pathway with Mosaic

You know, a rock pathway doesn’t have to look so, well, plain. If you grab some weather-resistant paint and a bit of inspiration, you can add all sorts of patterns, shapes, or maybe just a splash of color to a few stones here and there. Suddenly, the walkway feels more like you, without losing any of its usefulness.
Honestly, it’s a pretty budget-friendly way to liven up your yard. Painted rocks don’t take much effort, and as long as you use the right paint, they’ll last through plenty of seasons.
It’s usually best to mix in some plain stones with the painted ones; too much color can get overwhelming fast. A little restraint keeps things looking intentional, but still lets your personality peek through.