Updating your space doesn’t have to be a huge ordeal or cost a fortune. With a handful of simple tools and a little creativity, you can take on projects that make your home feel more functional and welcoming, without blowing your budget or losing your weekend. Honestly, even if you’ve never tried DIY before, these are projects you can totally pull off.
There’s something here for every nook and cranny, whether you want a fast decorative fix or a new storage solution. Some ideas just add personality, others make your daily routine easier, and a few do both. Why not make your home work for you?
1) Floating wooden shelves installation

Give your walls a boost with floating wooden shelves – extra storage, sleek look, no brackets in sight. They really do look like they’re just hovering there.
First, measure where you want them to go. Cut your wood, then anchor a hidden frame or sturdy brackets into the wall studs.
Slide the shelf over the frame, secure it, and sand everything smooth. Finish the wood however you like; natural, painted, whatever fits your vibe.
2) DIY 2×4 coffee table build

You can whip up a solid coffee table with just some 2x4s and a handful of screws. Materials are cheap, cuts are simple, perfect if you’re still getting the hang of woodworking.
Cut the boards for the top, legs, and supports. Lay out the tabletop, attach cross supports underneath, and build your base.
Once the legs are on and everything’s tight, sand it down. Pick paint, stain, or just clear coat it, totally up to you.
3) Painted kitchen backsplash update

Skip the tile demo, just paint that tired backsplash. It’s quick, way less messy, and your wallet will thank you.
Clean the surface so paint actually sticks. Bonding primer is your friend here, helps everything last.
Pick a kitchen-friendly paint for durability. Lighter colors open things up, but deep shades can look pretty striking too.
Top with a clear sealant so you can wipe off splatters without worry.
4) Bathroom towel rack from pipes

Try making a towel rack out of basic plumbing pipes and fittings – cheap, sturdy, and you’ll find what you need at any hardware store. Black or galvanized pipes both look cool, honestly.
Measure your wall space, cut the pipes, and screw them into elbows and flanges. Test your layout before you commit.
Once it’s together, anchor it to the wall. You’ll end up with a rack that’s practical and has a bit of industrial edge.
5) Entryway bench with storage

A straightforward entryway bench with storage underneath is easier than it sounds. Just a basic frame, some plywood, and a few screws.
Slide some bins or baskets underneath for shoes and bags. Suddenly, your entryway is way less chaotic.
Want it cozier? Toss a cushion or upholstered top on it. That one detail makes it feel warm and inviting.
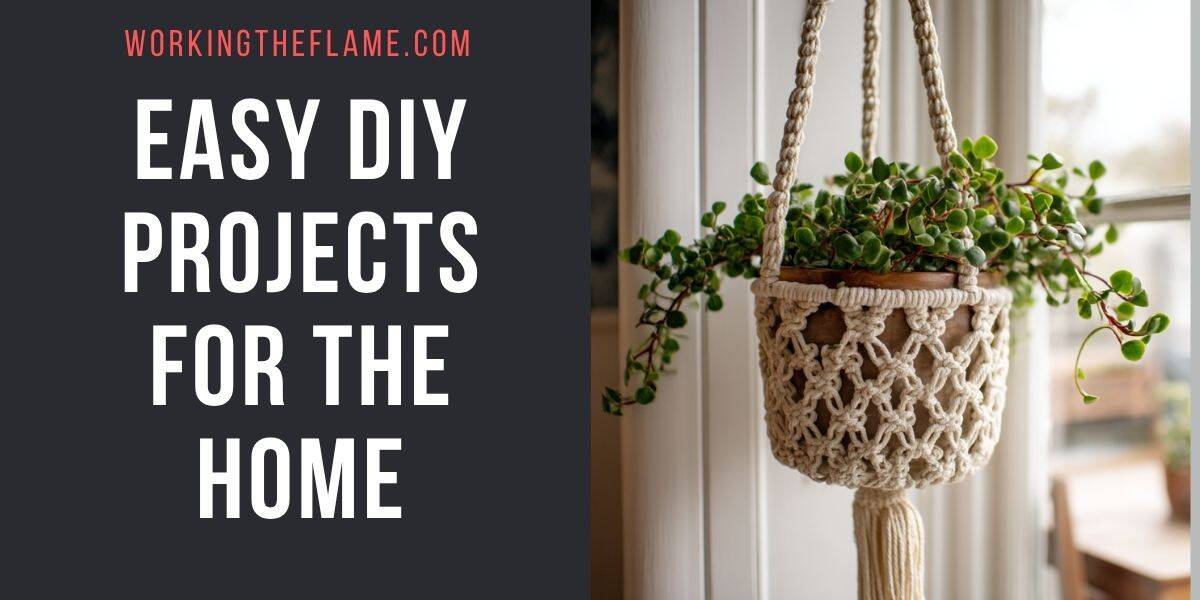
6) Macrame plant hanger crafting

Macrame plant hangers are surprisingly easy. All you need is some cord and a few basic knots – super beginner-friendly.
Cut your cords to equal lengths, tie them together at one end, and start knotting in pairs. That’s the structure for your pot.
Try out different knot patterns if you’re feeling creative. There are simple tutorials, or you can get fancy if you want something unique.
7) Pallet wood wall art

Old pallets make for easy wall art. Sand the boards, cut them up, and play around with layouts until something clicks. Paint or stain for a finished touch.
Geometric shapes, stripes, rustic panels, whatever you’re into. Each pallet board has its own quirks, so you get instant character.
Hang it up with sturdy hooks or brackets. It’s a cheap, quick way to add a handmade vibe to your space.
8) Concrete countertop resurfacing

Resurfacing your concrete countertops is a clever way to give your kitchen or bath a new look without ripping everything out. Clean, patch, and then apply a thin overlay mix.
Sand it smooth after it sets, then seal it so you don’t have to stress about stains or spills.
You can leave it classic gray or mix in color pigments if you want something bolder.
9) Reupholstering dining chairs

If your dining chairs are looking tired, just grab some fabric, a staple gun, and scissors. Most chairs with removable seats make this a breeze, just unscrew the seat base.
Peel off the old fabric, maybe swap out the padding, and cut your new fabric a little bigger than the seat. Pull it tight and staple from the center out.
Fresh foam or batting can add comfort too. It’s a small change, but it really perks up your dining space.
10) Installing peel-and-stick wallpaper

Peel-and-stick wallpaper is a game-changer for quick room makeovers. No paste, no mess, just peel and go.
Clean and dry your wall first. Measure and cut the wallpaper a bit longer than you need.
Peel off a little backing, line it up, and stick it down, smoothing as you go. If you mess up, just pull it back and try again.
Trim the edges for a neat finish. It’s pretty forgiving, honestly.
11) DIY terrarium with succulents

Making a little terrarium is honestly fun and takes hardly any supplies. Grab a glass container (a jar, vase, whatever), some gravel, soil, and a couple of succulents.
Layer rocks for drainage, add cactus soil, and nestle your succulents in. Press them in gently.
Top with sand or decorative stones for a finished look. Keep it in bright, indirect light and don’t overwater, as succulents like it dry.
12) Custom corkboard frame

Turn an old picture frame into a corkboard with just a cork sheet, scissors, and some glue. It’s a handy spot for notes, reminders, or photos.
Cut the cork to fit the frame, stick it on, and you’re set. If you want it to look a bit nicer, wrap the cork in fabric.
Stick it up in your office, kitchen, wherever you need to keep track of stuff. It’s useful and looks good, win-win.
13) Fabric-covered bulletin board

Give a plain cork board a facelift by covering it with fabric. You just need fabric, a staple gun or glue, and scissors.
Pick a pattern that fits your style, bold, subtle, whatever you like. Pull it tight so there aren’t wrinkles.
If you want, add some ribbon in a crisscross pattern for extra places to tuck notes or photos. It’s a simple way to make your board both more useful and a bit more stylish.
14) Simple pendant light fixture

Making a pendant light doesn’t have to be complicated or expensive. With a few basic supplies like a cord set, a bulb, and some sort of shade, you’re already halfway there. People get creative with this – using baskets, old bowls, or even jars as shades to keep things interesting (and cheap).
Just attach your chosen shade to the cord kit, screw in the bulb, and hang the whole thing from a ceiling hook. Play around with the height until it feels right in your space.
It’s a fun little upgrade for kitchens, dining rooms, or bedrooms. Not only do you get a light that actually works, but it adds a bit of your own style to the room.
15) Magnetic spice rack

A magnetic spice rack is surprisingly handy and honestly looks pretty cool. All you need are some metal tins and a magnetic board or a few magnetic strips. Suddenly, your spices are right there – easy to see, easy to grab.
You can stick the board on a wall, inside a cabinet door, or just slap those tins onto the side of your fridge. It really does free up counter and drawer space, which is always a win.
Don’t forget to label the tins (unless you’re into mystery meals). It’s an easy way to keep things organized without dropping a lot of cash.
16) Upcycled dresser makeover

Got an old dresser that’s seen better days? You can give it a whole new life without spending much. Sometimes just a coat of paint and some new handles does wonders. If you’re feeling adventurous, you could ditch a few drawers and turn the space into open shelves.
People have turned dressers into bathroom vanities, kitchen islands, even TV stands. If you’ve got leftover drawers, try hanging them as wall shelves or using them as storage bins.
If storage’s your main goal, just keep the dresser as-is and refresh the finish so it fits your style. Even little tweaks can make an old piece feel useful again.
17) DIY headboard from reclaimed wood

Building a headboard from reclaimed wood is a solid way to give your bedroom a bit of a refresh. Old pallets, barn boards, or leftover planks all work, and honestly, the more weathered, the better.
Start by sanding down any rough edges (nobody wants splinters), then lay out the boards however you like. You could go basic and stack them horizontally, but if you’re up for it, try a herringbone or chevron pattern for extra flair.
Attach everything to a plywood backing or mount it right on the wall. A light stain or clear coat brings out the grain and keeps things protected.
18) Installing a sliding barn door

Swapping out a regular door for a sliding barn door can totally change the vibe of a room. With a track and rollers, the door slides open instead of swinging, super handy for tight spaces.
First, measure your doorway and pick a door that’s just a bit bigger than the opening. Some folks build their own from wood planks, but honestly, you can buy one pre-made if you’re not up for it.
Mount the track into the wall studs, hang the door, and check that it’s level. Once it slides smoothly, you’re all set.
19) Building a raised garden bed

Building a raised garden bed is actually pretty straightforward. You just need some wood, bricks, or even old pallets, whatever you’ve got lying around. It’s a nice way to carve out a spot for veggies, herbs, or flowers, even if your yard’s not huge.
Pick a sunny place, then mark out how big you want the bed. Most folks go for a rectangle so it’s easy to reach from every side.
Once you’ve built the frame, fill it up with soil and compost. That’s it – you’re ready to plant! Raised beds really do make gardening a lot easier and help keep the weeds from taking over.
20) Creating a chalkboard wall

Ever wanted to turn a boring wall into something a bit more useful? Just grab some chalkboard paint and go for it. Suddenly, you’ve got a surface for scribbling notes, doodling, or planning out the week. Honestly, it’s not a big project, and definitely doable in an afternoon.
First, find a wall or even just a panel that’s nice and smooth. You’ll want to slap on some primer, then roll on a couple coats of chalkboard paint. Give it time to dry – seriously, don’t rush this part or you’ll regret it the first time you write something!
After that, the possibilities open up. Maybe you put it in the kitchen for grocery lists, or in the office for reminders, or let the kids go wild in their room. It’s a handy way to keep things organized, and hey, it actually looks pretty fun too.