
11 Blacksmith Projects Ideas That Sell (Make Money Blacksmithing)
For blacksmiths seeking to bring in supplemental income or start a serious business, selling easy-to-make projects made from inexpensive materials is an excellent strategy for increasing profits and simultaneously perfecting smithing skills.
The most sellable blacksmithing projects are also some of the easiest to complete, requiring only a few simple materials and steps. Clients love items that they can use daily and that look rustic and unique, like hooks, cooking tools, other small implements.
Below is a list of very simple and sellable blacksmith projects to fit the needs of beginner and more intermediate smiths alike.
What Tools Do I Need for These Projects?

Most of the projects discussed in this article are simple to make and require only the basic blacksmithing tools. These include a forge, an anvil or other appropriate work surface, a hammer, tongs, punches, chisels, metal bars and sheets, and a vice.
Other recommended tools are a swage block and drill press. These tools aren’t necessary, but they are handy to have in your workshop and are a great investment for future projects that require more advanced blacksmithing equipment. Safety equipment like aprons, gloves, and protective eyewear are also highly recommended.
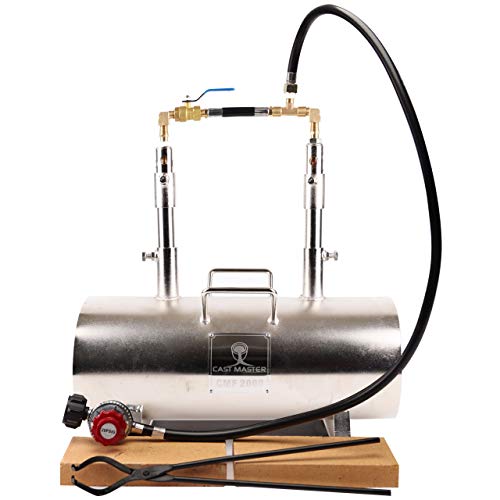
- Powerful Dual Burners: Equipped with two high-efficiency burners for rapid heating, providing...
- Durable Construction: Made from heavy-duty steel and insulated with fire-resistant materials...
- Large Forging Space: Spacious work area accommodates larger projects, allowing blacksmiths to work...
List of Blacksmith Projects That Sell Well (Make Money Blacksmithing)
1) Coat Hooks

A coat hook is a great piece to give to friends and family or sell at local events. Coat hooks are functional statement pieces that many people like to buy handmade. The rustic style of forged coat hooks looks great in most homes and are unique items that you can’t find in stores.
To make your own coat hook, you will need round stock, a forge and metal work surface, a hammer, tongs, and a ¼ inch punch. The first step in making your coat hook is to heat and strike the ends of the rod to upset them. This will create a decorative spearpoint-shaped end. Then, create two flat mounting points by striking into the rod in two places and creating a flat edge. These points can be placed anywhere in the rod, depending on your personal preference.
Reheat the bar and punch through the bar at marked points to create holes for screws to go through. Create the hook by curving the end of the rod around your anvil and finish the project by straightening out any misalignments. The original video tutorial for this project can be found here.
2) J-Hooks
Possibly the easiest project to make that also sells well, a J hook is a handy item to have around the home. J hooks can be used for hanging an endless array of items and are therefore super attractive to potential buyers.
To get started creating your own hooks, you will need steel bars, a forge, a metal surface or anvil to work on, a hammer, a chisel, and tongs. Begin by heating the end of the rod in the forge and then use your hammer to create a tapered point of approximately 1 ½ inches.
Once you have your tapered end, smooth the edges into a “rough round” by rotating and striking the taper frequently. This will create a more rounded shape and get rid of any defined edges.
Reheat the metal and shape into a U shape, bending the tapered point in on itself to create a curled end. Find the desired length that you want the hook to be and hot cut it using a chisel. This really depends on personal preference, just make sure that each hook is cut at the same point for uniformity.
After the hook is cut, straighten it out and hammer the straight end flat to make a mounting spot. Check out this video for more detailed instructions.
3) Drawer Pulls

Drawer pulls are super quick and easy items that only require a few basic tools. Clients love drawer pulls for both their aesthetic and practical value. For this project you will need a forge, anvil, hammer, tongs, small length of metal stock, and a drill press or punches.
Begin by heating the ends of the bar and hammering them flat to create the feet of the drawer pull. These points are where the pull will attach to the drawer. Then, bend the feet back so that they are at the proper angle for installation. For more advice on how to do this, check out the original video here.
Heat the main portion of the drawer pull and curve it around the horn of your anvil until it takes on an arched shape. There are no rules when it comes to making the curve of the drawer pull, so shape it to your preferred style.
To make the holes for attaching the drawer pull to a surface, use a punch or a drill press. The original designer suggests using a drill press but either tool will work.
4) Decorative Bowls

Decorative bowls, such as this heart bowl, are a perfect item to sell for anniversaries, Valentine’s Day, weddings, and other events. For this project you will need a sheet of metal, a forge, anvil, a hammer, and swage block. For detailed instructions on cutting the metal into a heart shape, check out the video tutorial here.
Once you have a heart-shaped piece of metal, transfer it to a swage block and hammer into a rounded bowl shape. Finish the bowl by polishing it to the desired effect, or leave it with a rough, forged look. These bowls can be made in any size and finish and for additional sellability, you can stamp initials, names, or dates into the bowl to personalize it for each client.
5) Meat Skewers

To make meat skewers you will need a long, thin metal bar, a forge or torch, a work surface, a hammer, and a vice.
Heat one end of the bar in the flame of a forge or torch. For this project, a torch can be useful for concentrating the heat towards the end of the bar, but a forge also works. Curl the very end of the bar in on itself to make a decorative end, then create a larger loop to finish the handle of the skewer.
Place the skewer in a vice and turn it to make an even twist along the length of the bar. Taper the end of the bar to make a distinct point. Watch the original video for more information.
6) Floating Shelf Brackets

This project requires 1/2 inch square bar. Measure and mark where to cut for the length of each bar. The tutorial shows the bars being cut to 14 inches, but you can customize as needed. Cut the bars to size. You should have three bars for a large shelf as shown in the video.
Mark points along the bar as shown. These points will be where your screws will be placed. Punch a few divots at each of these points.
Place the bars in the forge and once they are hot, hammer the sharp edges off of each end of the bars. Chamfer the ends slightly.
Use a piece of 3/8 round bar to create a divot in the center of each bar. This is the place where you will bend the bar later on in the process.
Drill holes at each of the previously measured points using a drill press or another method of your choice. Heat the bars again and bend the bar in the middle at the point hollowed out with the 3/8 bar. Repeat these steps for each bar.
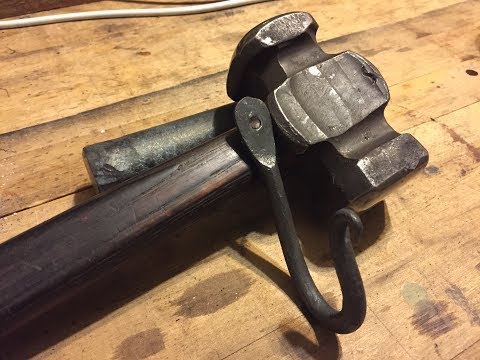
7) Blacksmith Rounding Hammer

To make a rounding hammer that is sure to sell, you will need a 5 inch piece of round bar with a 2 inch diameter. Square up the bar using a power hammer and even up the ends as needed.
Use a punch to mark where to put the eye. Then, form the shape of the hammer and its square and round faces by using a power hammer or working by hand. Drift the eye of the hammer.
Repeat squaring and rounding the faces of the hammer and drifting the eye until everything is even. These steps may have to be repeated several times until you reach your desired outcome.
Grind the hammer head down and quench. Then attach a handle of your choosing and the hammer is complete!
8) Flat Bit Tongs

Tongs are a required tool for every blacksmith, so they sell fast. Begin with 2 square bars. Mark your anvil as shown in the video and heat up your bars. Line up the bars with the mark you made and hammer, creating the initial shape of the tongs. Repeat for the second bar.
Reheat and hammer again to set down the tongs. Draw out the tongs as shown. Punch a hole through both bars to create the hinge point. Draw the hole out as desired.
The last step is to insert a rivet to attach the two tong pieces together.
9) Campfire Cooking Tripod

5/8 inch round bar works well for cooking tripods, but you can use whatever you have on hand. You will need 3 bars of equal lengths. There is no required length for the bars, so you can make your tripod as large or small as you want.
Heat the bars and taper one end of each bar to a blunt point.
Forge the other end of each bar into a ring as shown in the video. There are few different ways to do this, depending on your skill level.
Offset the ring of one bar and link through the other rings. Then hammer the ring back into shape to connect the bars together.
10) Forged Wand

Handmade wands are popular among fans of Harry Potter and live action role play. To make your own wand, begin with a 5/16 inch round rod and heat it up. Square and draw out the end of the rod to make a point.
Flatten out the wand just below the point as shown in the video. Then measure and mark every inch along the length of the wand. Place the wand in a vice and twist at each mark you just made. This will create a beautiful twisted design along the wand. Finish by grinding the wand to a shine.
11) Garden Trowel

Measure a thick piece of steel bar. Using a power hammer, shape and flatten the bar to make the blade of the trowel. At this stage, the trowel shape will be uneven. This will be fixed in the next step.
Trace out the desired shape of the trowel blade with a marker. Cut out the shape of the trowel as shown in the video. Grind the edges smooth.
Reheat the trowel and hammer a slight curve in the blade. Attach a wooden handle if desired.
Thank you-liked coat and J,I am just now learning to forge
Very nice work. I’m still a beginner. I just got back from forging today. Made another hook for my daughter.
Where do you purchase the swage block?
I made two of these projects and not only were they easy to make they were fun. ps I am 11.
I am a retired welder and your tutorial brought back memories and stirring’s of artistic desire. Thank you.