Crafting at home doesn’t have to mean a big shopping trip or a pricey materials list. Honestly, most fun projects can be whipped up with everyday items you probably already have lurking in your kitchen drawers, junk basket, or recycling bin. It’s spontaneous, budget-friendly, and way more satisfying when you make something cool out of “nothing.”
Below, you’ll find ideas using stuff like mason jars, paper plates, fabric scraps, and other odds and ends. Some are super simple, others a bit more involved, but all are doable with what’s lying around. Whether you’re after a quick organizer, a homemade gift, or just want to make your space feel a little more you, there’s something here to get you started.
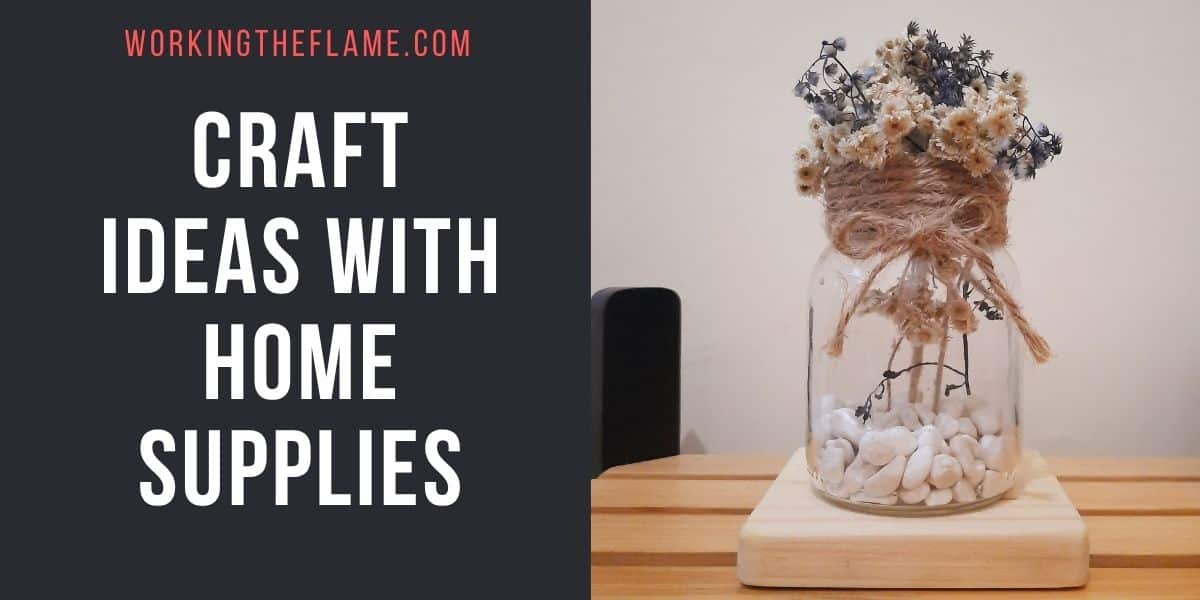
1) Painted Mason Jar Vases with Twine Wrap

Grab some mason jars and give them a new life as decorative vases. Just paint the outside with your favorite color – chalk paint looks especially nice, but really, anything goes. Once it’s dry, wrap some twine around the neck or the middle, and glue it down.
The mix of paint and twine gives a cozy, handmade vibe. These jars look great filled with flowers (fresh or dried), or just sitting empty on a shelf.
2) Bottle Cap Magnets with Hot Glue and Decorative Paper

Don’t toss those bottle caps, as they’re perfect for making fridge magnets. Clean them up, then grab some cute paper scraps or stickers and cut them to fit inside the cap.
Glue the paper in, then hot glue a small magnet to the back. Once it’s dry, you’ve got a custom magnet for notes or photos. Easy, personal, and a little addictive to make.
3) Toilet Paper Roll Bird Feeder with Peanut Butter and Seeds

Want to help your local birds? Smear a toilet paper roll with peanut butter and then roll it in birdseed. That’s really it.
Thread a bit of string or ribbon through the tube, tie it off, and hang it outside. Birds will find it in no time. It’s fast, fun, and you’ll get to watch the birds up close.
4) Upcycled T-Shirt Tote Bag (no-sew)

Turn old t-shirts into handy tote bags – no sewing required! All you need are scissors and, well, a shirt. Cut off the sleeves and neckline for handles, then snip fringe along the bottom.
Tie the fringe together in pairs to close the bottom of the bag. If your shirt’s a bit thicker is even better, as it’ll hold more. These are perfect for groceries, books, or just tossing in your car for errands.
5) Wine Cork Xmas Ornaments

Wine corks are surprisingly perfect for turning into painted Christmas ornaments, and it’s a great way to reuse something that would normally get tossed out. With a little paint, they can become tiny snowmen, reindeer, or even miniature Santas, depending on the details you add.
Once you attach a small hook or ribbon, they’re ready to hang on the tree and bring a bit of handmade charm to your holiday decor.
6) Paper Plate Dreamcatcher with Yarn and Feathers

Got a paper plate? You’re halfway to a dreamcatcher. Cut out the center, punch holes around the rim, and use yarn to weave a web pattern through the holes.
Tie on beads and feathers at the bottom, and add a yarn loop at the top for hanging. It’s a fun, colorful project, especially for kids’ rooms.
7) Salt Dough Keepsake Ornaments

Salt dough ornaments are a classic for a reason. Mix equal parts flour and salt, then add about half as much water to make a dough. Roll it out, cut shapes with cookie cutters, or press in handprints for a keepsake.
Bake until hard, let cool, and then paint however you like. Sand the surface a bit if you want things extra smooth. It’s a sweet way to capture a moment in time.
8) Tin Can Lanterns with Hammered Hole Pattern

Save those empty tin cans and peel off the labels. Fill each can with water and freeze, as this keeps the can from denting while you work.
Use a hammer and nail to punch holes in whatever pattern you like. Zigzags, stars, hearts, up to you! Sand any sharp bits on the rim. Pop a battery LED light or tea light inside, and you’ve got a cozy lantern for your porch or windowsill.
9) Scrapbook Paper Origami Photo Envelopes

Leftover scrapbook paper? Fold it up into cute origami envelopes for photos or small notes. Choose a pattern that fits the vibe you’re after.
Start with a square or rectangle, follow a basic folding pattern, and you’re done. Adjust the paper size to fit whatever you want to tuck inside. These make photo gifts feel extra special.
10) Button-Embellished Hair Clips

Plain alligator clips get a major upgrade with buttons. Clean the clips and buttons first, then add a dab of hot glue to the back of the button and press onto the clip.
Stack different sizes or colors if you’re feeling bold. French barrettes work too, but alligator clips are super easy. Pick buttons that match your style, or, honestly, just whatever makes you smile.
11) Pom Pom Stars with a Fork

If you’ve got a fork and some spare yarn, you’re already halfway to making the cutest little pom poms. Wrapping the yarn around the fork’s prongs keeps everything neat and evenly sized, so you end up with perfectly fluffy minis every time.
Once they’re tied off and trimmed, they’re ready to be turned into garlands, keychains, gift toppers, or whatever else you’re in the mood for. It’s one of those oddly satisfying crafts that’s quick, simple, and way more addictive than it should be.
12) Chalkboard Painted Wooden Clipboard Organizer

An ordinary wooden clipboard can become a mini chalkboard organizer. Just brush on a couple coats of chalkboard paint, letting each one dry.
Once it’s ready, jot down to-dos or reminders with chalk. Hang it up wherever you need a little extra organization. The clip is handy for holding mail or recipes, while the painted surface is perfect for quick notes.
13) DIY Scented Soy Candle in Recycled Tea Tin

Empty tea tins are just asking to be turned into candles. Melt soy wax flakes in a double boiler, add a few drops of your favorite essential oil, and set a cotton wick in the tin.
Pour the wax in and let it cool for a few hours. You’ll have a lovely, custom candle that makes a great gift, or just a treat for yourself. Plus, it’s a nice way to reuse those pretty tins you can’t quite throw away.
14) Fabric Scrap Patchwork Pillow Cover

Got a pile of fabric scraps you just can’t toss? Why not turn them into a patchwork pillow cover? Just trim your scraps into squares or rectangles, and play around with the arrangement until you find something that feels right. Stitch ’em together, and you’re halfway there.
If you’re new to patchwork, this is a solid starter project. Grab those leftover fabrics, some thread, a sewing machine (or just a needle if you’re patient), and a pillow insert. The end result? A one-of-a-kind pillow cover that adds a personal touch to your room and keeps all that fabric out of the landfill. Not too shabby.
15) Mason Jar Lid Soap Dispenser

Take a plain old mason jar and give it some flair by turning it into a soap dispenser, beads and all. Drill a hole in the lid to fit your soap pump – this part takes a little patience. Use waterproof adhesive or contact cement to keep the pump in place.
Now comes the fun part: grab your hot glue gun and stick beads around the lid’s edge. Go wild with colors or stick to a theme, totally your call. Suddenly, your bathroom or kitchen gets a quirky upgrade, and you barely spent a thing.
16) Dried Pasta Necklaces

Remember those pasta necklaces from childhood? Turns out, they’re still fun. Grab some dried pasta, toss it in a ziplock with a bit of paint, seal it up, and squish the color around until everything’s coated. Lay them out on parchment to dry.
Once your pasta is ready, thread it onto yarn or string. It’s a great way for kids to practice threading, but honestly, adults can get pretty creative with shapes and colors too. Throw in some beads if you want to mix things up.
17) Ice Cream Stick Mobile and Pen Holder

Ice cream sticks are one of those humble supplies that can turn into something unexpectedly cool with a bit of creativity. Arrange and glue them into simple geometric frames for a hanging mobile, then decorate each section with paint, beads, or tiny paper cutouts to give it movement and personality.
With the same sticks, you can also build a compact pen holder by stacking them into a small open box shape and customizing the outside with patterns or bright colors.
18) Egg Carton Succulent Planters

Empty egg cartons are surprisingly handy for little succulent planters. Just cut off the lid, poke a few drainage holes in the bottom of each cup, and drop in a layer of small pebbles to help with airflow and drainage.
Fill each section with a succulent soil mix, but don’t overfill, and leave a bit of space at the top. Pop in your succulents or even some cuttings if you’re propagating. The carton breaks down eventually, so you can plant it right into a bigger pot later if you want. Easy, cheap, and kind of adorable.
19) Glass Bottle Princess Dolls

Empty glass bottles can become the base for the sweetest fairytale decor with a bit of colorful clay. By layering different shades around the bottle, you can shape out a flowing gown, add a fitted bodice, and build up soft ruffles so it starts to resemble a tiny princess figurine.
Blending colors gives the “dress” more depth, and small details like braided hair or a crown bring the character to life. Once it’s set on a shelf, it looks less like a recycled bottle and more like a handmade storybook ornament.
20) Sparkling Glass Jar Vase
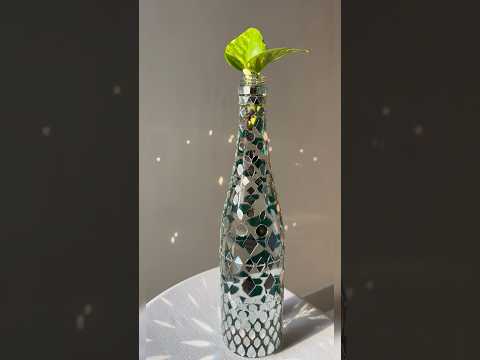
A tall clear glass bottle can turn into a striking statement piece with nothing more than a handful of reflective shards or mirror tiles. By carefully gluing the pieces around the surface, you create a mosaic that bounces light in every direction.
Set it near a sunny window and it transforms into a mini light display, scattering bright reflections across nearby walls and tables. It’s a simple upcycling idea that delivers a surprisingly dramatic effect, blending clean glass with shimmering detail in the best way.