If you’re itching to get creative but don’t want to invest in expensive materials, paper crafting is a surprisingly fun way to start. With just some craft paper, scissors, and a handful of basic supplies, you can whip up everything from handmade gifts and quirky décor to little personalized touches for your space. Paper’s versatility honestly makes it perfect for anyone, whether you’re just dipping your toes in or you’ve been crafting for years and want a quick win.
Here’s a collection of 20 ideas that’ll show you how craft paper can become wall decorations, ornaments, greeting cards, and even party accents!
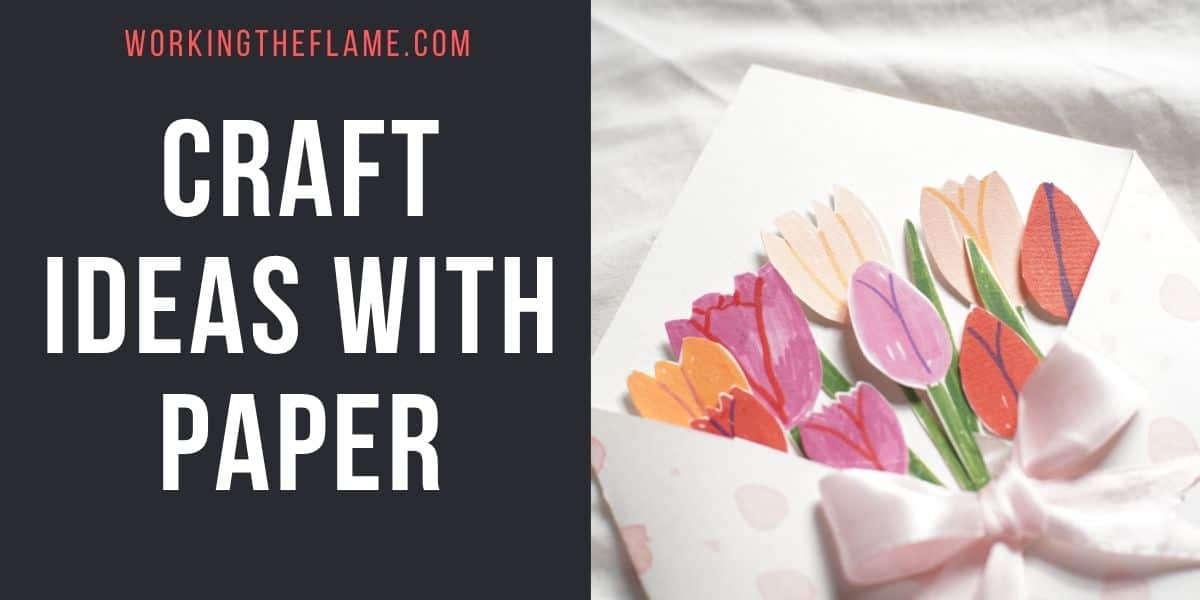
1) Paper Flowers

Paper rosettes are a classic! Just fold strips of craft paper back and forth (accordion-style), glue the ends together, and fan them out into a circle.
They’re awesome for party backdrops, bedroom walls, or just whenever you want to jazz up a space. Play with sizes and colors for a layered look.
You really don’t need much for this one, and it comes together super fast. Great if you want to see results without a ton of effort.
2) Craft Paper Butterflies

Paper butterflies are one of those crafts that look impressive, but honestly, you can make them in a few minutes. Just fold up some craft paper, cut, glue and crinkle to shape.
They’re perfect for jazzing up greeting cards, adding a cute touch to gifts, or sticking on notebooks. Or, make a bunch and string them together for a garland, or stick them on the wall for a seasonal vibe.
3) Paper Lanterns with LED Lights

Making paper lanterns is a fun way to play with light; plus, with LED lights, you don’t have to worry about fire. Fold or roll your paper into whatever shape you like (cylinder, geometric, whatever), then secure the edges with glue or tape.
Drop in an LED candle or string lights, and you’ve got instant ambiance. Cut out shapes, paint designs, or layer colored paper for different effects when the lantern’s lit up.
They’re great for parties, cozy home corners, or any celebration where you want a bit of glow.
4) Stringy Paper Flowers

Flowers that really pop with color! Spread out your paper, and with a few folds, some glue, and a whole lot of little cuts, you’ll be able to create some standout puffy flowers.
Mix up the colors or keep it monochrome for a more subtle look. You can make roses, dahlias, or just make up your own kind of bloom!
5) Accordion Folded Paper Fans

If you’re after something ridiculously easy, these accordion fans are it. Just fold your paper in a zigzag, pleat it all the way, then pinch and glue or tape the bottom.
Pop on a craft stick if you want a handle. They’re nice for cooling off, but honestly, they look cute as party decorations or even as an add-on to a gift.
6) DIY Paper Mobiles

Mobiles aren’t just for nurseries, though they’re great there too. Fold up some colorful cardstock into 3D shapes (teardrops, diamonds, whatever you like), then cut and string them at different lengths.
Hang the pieces from thin branches or a wire hoop, and you’ve got a mobile that’ll dance in the breeze. Change up the colors to match your room or just go wild.
7) Pop-up Greeting Cards

Pop-up cards are always a hit. With some clever cuts and folds, you can make sections of your card pop forward – hearts, flowers, or even little buildings if you want to get ambitious.
They’re perfect for birthdays, holidays, or just because. Start simple (hearts, flowers, that kind of thing) and get fancier as you get the hang of it.
8) Paper Quilling Art

Paper quilling is a bit fiddly but super rewarding. Roll thin strips of paper into coils and shapes, then glue them together to make intricate designs; flowers, swirls, whatever you dream up.
All you need is some paper strips, a quilling tool (or even a toothpick), and glue. It’s surprisingly versatile, and you can use it for wall art, cards, or just as a meditative project.
9) Paper Garland Banners

Garlands are a quick way to make any space festive. Cut shapes (circles, triangles, hearts, you name it) from craft paper and string them together with ribbon or string.
You can go simple or get fancy with flowers or themed cutouts. Paper garlands are super customizable, so match your party theme, your mood, or just use up whatever scraps you have.
10) Paper Wall Art

If you’re into clean lines and bold shapes, try cutting craft paper into triangles, hexagons, or whatever geometric shape you like.
Mix colors that match your space or go bold for a statement. It’s a great way to fill a blank wall without spending much, and you can always rearrange or swap out pieces when you get bored.
11) Cut-out Paper Snowflakes

Snowflakes are a winter staple and honestly, they never get old. Fold up a square of paper, snip out patterns along the edges, and unfold to reveal your one-of-a-kind design.
Follow a template or just experiment and see what happens. Stick them on windows, hang them up, or use them as ornaments, each one’s a little surprise.
12) Paper Bookmarks with Tassels

Bookmarks are a simple, practical project. Cut craft paper or cardstock into strips (about 2 by 6 inches works), and if your paper’s thin, back it with something sturdier.
Add a tassel at the top – either glue it on or punch a hole and tie it through. Decorate the bookmark however you like before adding the tassel. Easy, and you’ll never lose your page again.
13) Folded Paper Star Ornaments

These folded stars are a fun way to use up leftover paper. Accordion fold, cut, and unfold to reveal a star shape; five, six, or seven points depending on how you fold.
Hang them as tree decorations, in windows, or on the wall. Play with different papers and patterns for a look that fits your space.
14) 3D Paper Animal Models

Dimensional animal models are a hit with kids (and adults who like a challenge). Use printable templates or sketch your own animals, cut them out, and assemble them into 3D shapes.
There are loads of templates for bears, foxes, cats, dogs etc. They’re great for decorating, learning, or just as a rainy-day project.
15) Craft Paper Dancer

Turn simple strips of craft paper into a playful, “dancing” figure. Roll the paper loosely into coils and curves, then glue them onto a sturdy paper base to form the body, arms, and legs.
Keep the rolls slightly lifted so they aren’t pressed flat. As you tilt or move the paper, the loose coils give a subtle bounce and sway, making your cute little character look like it’s dancing.
16) Paper Umbrellas

Layered paper circles create instant dimension. Fold multiple paper circles in half, then glue the folded edges together side by side to form a rounded, 3D canopy shape.
Once the dome is complete, attach it to a plastic straw for the handle. The stacked folds give the umbrella depth and structure; simple shapes, cleverly combined, with a charming pop‑up effect.
17) Paper Pinwheels

Pinwheels are pure fun! Cut a square from craft paper, snip diagonally from each corner toward the center, then fold alternating points in and pin them to a pencil eraser.
Give it a puff of air and watch it spin. They’re great for parties, outdoor decorations, or just for fidgeting at your desk.
18) Mini Paper Envelopes

Mini envelopes are adorable and surprisingly handy for notes, gift cards, or little surprises. Fold up some craft paper scraps, secure with glue or tape, and you’re done.
They’re perfect for scrapbooking, adding to cards, or attaching to gifts as tags. Plus, you can make a bunch in no time.
19) Paper Bow Ties for Gift Wrapping

Paper bow ties are a quick way to dress up a gift. Fold strips of paper accordion-style, pinch in the middle, and secure with tape or glue.
They’re perfect for small packages or gift bags, and you can match them to any occasion by switching up your paper. Easy, fast, and way cuter than a store-bought bow.
20) Paper Pom-Poms

Paper pom-poms are a fun, lightweight swap for the usual yarn ones, and honestly, they brighten up parties or bedrooms in a snap. Making them isn’t rocket science: just layer a few sheets of tissue paper, fold them back and forth like an accordion, and tie up the center with some wire or string, whatever you’ve got handy.
After that, snip the ends into rounded or pointy shapes, depending on your mood. Then comes the tricky part: gently pulling apart each layer until you’ve fluffed out a full, cheerful sphere.