
Wood slats are honestly one of the easiest ways to add some structure, warmth, and a bit of personality to your space. Whether you’re itching to refresh a room, build something handy, or just want to use up leftover materials, these simple boards can fit almost any idea. You can turn plain slats into practical furniture, fun decorative accents, or even dramatic design features, and you really don’t need to be a woodworking pro.
Working with slats feels pretty approachable, even if you’re not super experienced. They’re flexible, budget-friendly, and can scale from tiny crafts to major home upgrades. From accent walls and furniture to clever storage and décor, the projects below show just how much you can pull off with a straightforward material and a free weekend.
1) Wood Slat Accent Wall for Living Room

A wood slat accent wall in the living room? It’s a classic move for a reason. Those clean lines bring in texture without making things feel heavy, and you get to decide if you want it bold or more subtle.
Wwide spacing feels airy, while tight slats give a more solid look. Both work, so it’s really about what fits your wall best.
Paint or stain helps blend it in with your furniture. Natural wood keeps things cozy, but a dark stain? That can get pretty dramatic. Still, it’s a project that stays simple and easy to tweak.
2) DIY Wood Slat Serving Tray

Grab some scrap slats and you can whip up a serving tray in no time. Just cut the slats to match, line them up, and pop on some cross supports underneath.
Handles make it way easier to carry, obviously. Leather straps, metal pulls, or even just cut-out slots – pick what fits your style.
This tray works for snacks, coffee table displays, or as a base for whatever seasonal stuff you’re into. It’s a quick build, and you don’t need fancy tools or skills.
3) Simple Wood Slat Stool

A few wood slats and basic tools are all you need for a sturdy little stool. Cut, sand, and attach the slats to a simple frame, nothing complicated here.
This stool can be extra seating, a side table, or a plant stand. Its straight lines keep it looking pretty timeless, honestly.
Leave the wood natural for a rustic vibe, or paint it if you’re after something more modern. Either way, it’s easy on the wallet and doesn’t take forever to finish.
4) Wood Slat Headboard for Bed

Building a wood slat headboard isn’t as intimidating as it sounds. All you need are some cut boards and basic tools. Go horizontal for a simple look, or stack them vertically if you want something taller.
You can attach the slats to a plywood back for more support, or mount them straight to the wall for a floating effect. Even spacing keeps things neat, but mixing up widths or angles adds a little extra flair.
Pine or common hardwoods are affordable and take stain or paint well. It’s a practical project that won’t break the bank.
5) Wood Slat Room Divider
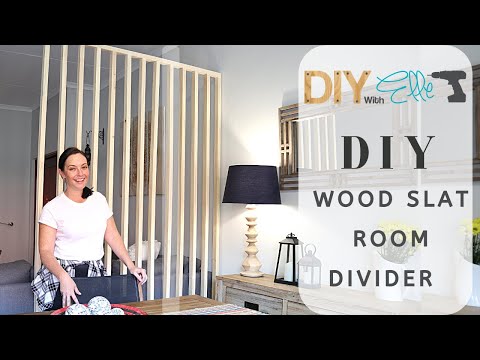
A wood slat room divider is a clever way to split up a space without boxing it in. Vertical slats keep things open, but still give a little privacy and structure.
Just cut your slats to the right height, space them out, and secure them with screws or brackets. A simple frame makes it sturdier, which is always a plus.
You can stain, paint, or just leave the wood as-is for a lighter look. Whatever matches your vibe.
6) Wood Slat Planter Box

A wood slat planter box is great for adding some greenery, and it’s not a tough build. The slatted sides keep the look modern while helping with drainage.
Start with a basic frame, then wrap it with evenly spaced slats. Cedar or treated wood is your friend if this will live outside.
Line it with landscape fabric if you want to keep the dirt in check. Once it’s done, you’ve got a sturdy home for flowers, herbs, or whatever you like to grow.
7) Wood Slat Wall Shelves

Wood slat wall shelves are a nice way to combine storage and style. The slats give you a strong backing, and shelves break up the lines with some practical space.
Some folks run the slats horizontally for a more natural shelf fit, while others go vertical and use brackets into studs. Either way, planning your layout first saves headaches later.
Fill any nail holes, sand the edges, and match the finish for a polished look. It keeps things useful without losing that modern edge.
8) Wood Slat Wall Art Panels

Wood slats can turn into wall art pretty easily, just arrange them into geometric shapes or patterns. Chevrons, straight lines, or angles all work for a modern feel.
Mix up paint or stain colors to add contrast. Light and dark finishes together really make the piece pop, but you can keep it subtle too.
Mount the whole thing on a frame so it’s easy to hang and move around. It’s a solid option if you don’t want something super permanent.
9) Wood Slat Fireplace Surround

Wrapping your fireplace with wood slats gives it a crisp, modern update. The lines add texture, and the project isn’t as tricky as it looks.
Measure around the fireplace and cut your slats to fit. Furring strips or pre-cut boards can make things go faster and cut down on waste.
Attach the slats to drywall or a frame with nails or adhesive, keeping the spacing even. Finish with stain or paint to match your space, or just go with whatever you like.
10) Wood Slat Ceiling Treatment

A plain ceiling gets a major boost with some evenly spaced wood slats. The lines look modern, and you don’t need fancy skills to pull it off.
Secure furring strips to the joists for a base, then attach the slats with nails or screws. Keep the spacing consistent for a clean effect.
Lighting looks especially cool here: try LED strips or recessed lights between the slats for a soft, indirect glow.
11) Wood Slat Bathroom Vanity Front

Modernize your bathroom vanity just by adding wood slats to the front – vertical or horizontal, both work. It’s a straightforward way to add structure and texture.
Cut the slats to fit your vanity doors or drawers, and space them out evenly.
Seal or stain the wood so it can handle moisture. If you love the natural look, a clear finish is perfect, but a dark stain can make it stand out.
12) Wood Slat Kitchen Panelling

Wood slat panelling brings texture and warmth to the kitchen, and it’s a nice break from tile. The lines give a modern touch but keep things feeling natural.
Go vertical if you want the space to feel taller, or horizontal for a wider effect.
Don’t forget to seal the wood to protect it from moisture and stains. Clear finishes show off the grain, while tinted sealants give more depth.
13) Wood Slat Coat Rack

Turn some leftover wood slats into a wall-mounted coat rack that doesn’t hog space. It’s a super easy way to keep coats, bags, and hats from piling up.
Cut the slats to match, sand them down, and line them up on a backing board or right on the wall. Add hooks at intervals that make sense for your stuff.
A clear finish or light stain keeps it crisp, but you can always paint the slats for a pop of color.
14) Wood Slat Wine Rack

A wine rack made from leftover wood slats? Totally doable, and you don’t need fancy tools. Arrange the slats horizontally or vertically, depending on how many bottles you want to stash.
Space the slats so bottles rest securely as nobody wants rolling wine. Add a few angled cuts for neck slots if you’re feeling fancy.
If you want to take it up a notch, add a slat underneath for stemmed glasses. Sand everything smooth and finish with a clear coat for a clean, practical look.
15) Wood Slat Book Wall

Looking for a stylish way to display your favorite books or décor? Try building your own wood slat wall shelving! This project combines clean lines with natural texture, making it perfect for any modern, rustic, or minimalist space.
Start by cutting a few wooden slats to your desired length – reclaimed wood or pine boards work beautifully. Sand the edges smooth, then stain or paint them to match your room’s style. Mount the slats horizontally onto the wall, spacing them evenly and securing them with sturdy brackets or hidden supports.
Once your base is up, add simple wooden shelves between the slats. You can vary the spacing to fit books, plants, or decorative items.
The result is a functional, eye-catching wall feature that turns your book collection into a design statement. A little bit of wood, some careful measuring, and you’ve got a custom shelving system that’s both practical and beautiful.
16) Wood Slat Mirror Frame

If your mirror’s looking a bit plain, why not dress it up with some wood slats? Just cut the slats to fit each side, sand them down so they’re smooth, and you’re halfway there.
Stick the slats on with wood glue or tiny nails. Try to keep the spacing even (or don’t, if you like a more rustic vibe). You can stain or paint them, depending on what matches your space.
It’s a great way to use up scrap wood, honestly. The frame adds a bit of texture and interest, but the mirror still does what it’s supposed to.
17) Wood Slat Wall Mounted Desk

Need a desk but don’t have much room? A wall-mounted desk with wood slats might be the answer. The slats give it both style and strength, so you get a sturdy workspace without big, clunky legs in the way.
Mount it at whatever height feels right for you. Some simple brackets or hidden supports will hold it up and keep that floating look everyone seems to like.
If you want, you can add a few shelves or hooks between the slats for extra storage. Keeps things tidy and off the floor, which is always a win.
18) Wood Slat Wall Mounted TV Surround

Want your TV wall to look a bit more intentional? Framing it with vertical or horizontal wood slats can do the trick. The slats give the whole setup some structure but don’t make it feel crowded.
Mount the TV right onto the slat wall using a sturdy bracket, and you can hide the wires for a cleaner look. If you need storage, a floating console in a matching finish keeps things from getting messy.
Light oak or walnut slats are pretty popular for that modern vibe, but you can always stain or paint them to fit your style. Just try to keep the gaps between slats consistent so it doesn’t look wonky.